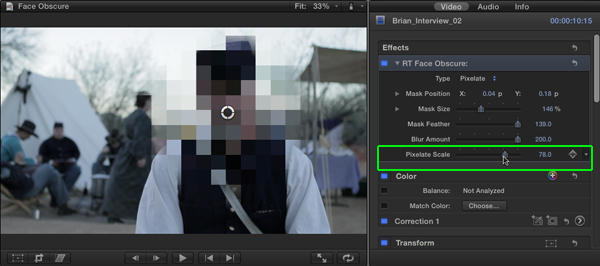
Using the Face Obscure plugin for Final Cut Pro X:
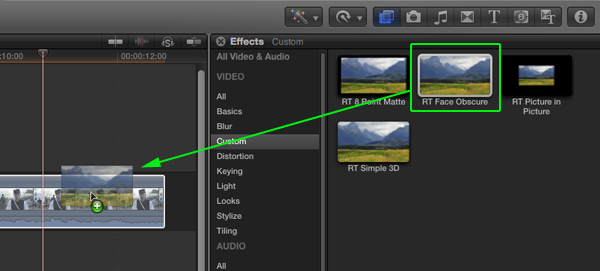
In the Effects Browser, select the Custom category, then locate the RT Face Obscure Effect. Drag the effect onto any clip (or clips) in the Timeline; or if the clip is selected, double-click the effect thumbnail.
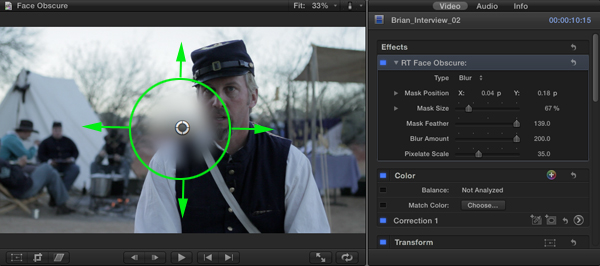
With the clip selected, press Command-4 to reveal the Inspector window. The Face Obscure Effect and its parameter controls appear at the top of the inspector. To move the blur mask over your subject, click and drag on the target circle in the center of the Viewer. You can also keyframe the Mask Position if the subject moves.
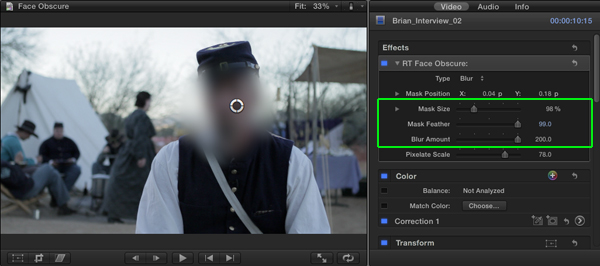
From the Type pop-up, choose one of two obscure effects: Blur or Pixelate. You can adjust the Mask Size, Mask Feather & Blur Amount for both the Blur and Pixelate options.
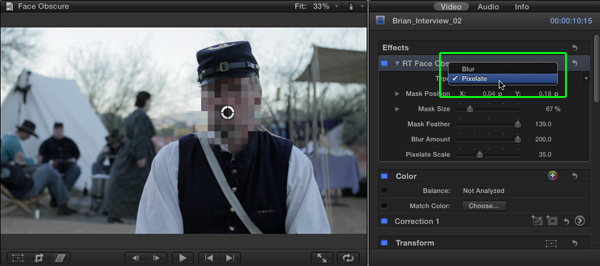
If you prefer to pixelate the image, choose Pixelate from the Type pop-up menu.
Use the Pixelate Scale slider to adjust the blockiness of the mask.
Image courtesy of Prescott Pictures

