Using the Ken Burns Effect in Final Cut Pro X
Today, I’ll show you how to use the Ken Burns Effect to reveal different parts of a photo without using key frames.
I know a lot of you out there shoot photos. Here’s a photo of basically Team Ripple. We’re sitting out in the field, we’re relaxing, it’s kind of a production shot. I really want to animate from one subject to the other. In fact, let’s take a look at the finished product so you can see what it’s going to look like when we’re done. So you can see the camera pans from one subject to the other then it holds, then it animates over again, holds, then pulls out and we have our large scale picture of everyone in the frame. Very easy to do inside Final Cut Pro and you don’t have to use a single key frame. I’m going to go ahead and open up this project, called Team Ripple and I’m going to add the photo to the timeline by selecting the photo and pressing E to add the clip to the timeline.
Step 1: Add a photo to the timeline in Final Cut Pro
I’m going to go ahead and open up this project, called Team Ripple and I’m going to add the photo to the timeline by selecting the photo and pressing E to add the clip to the timeline.
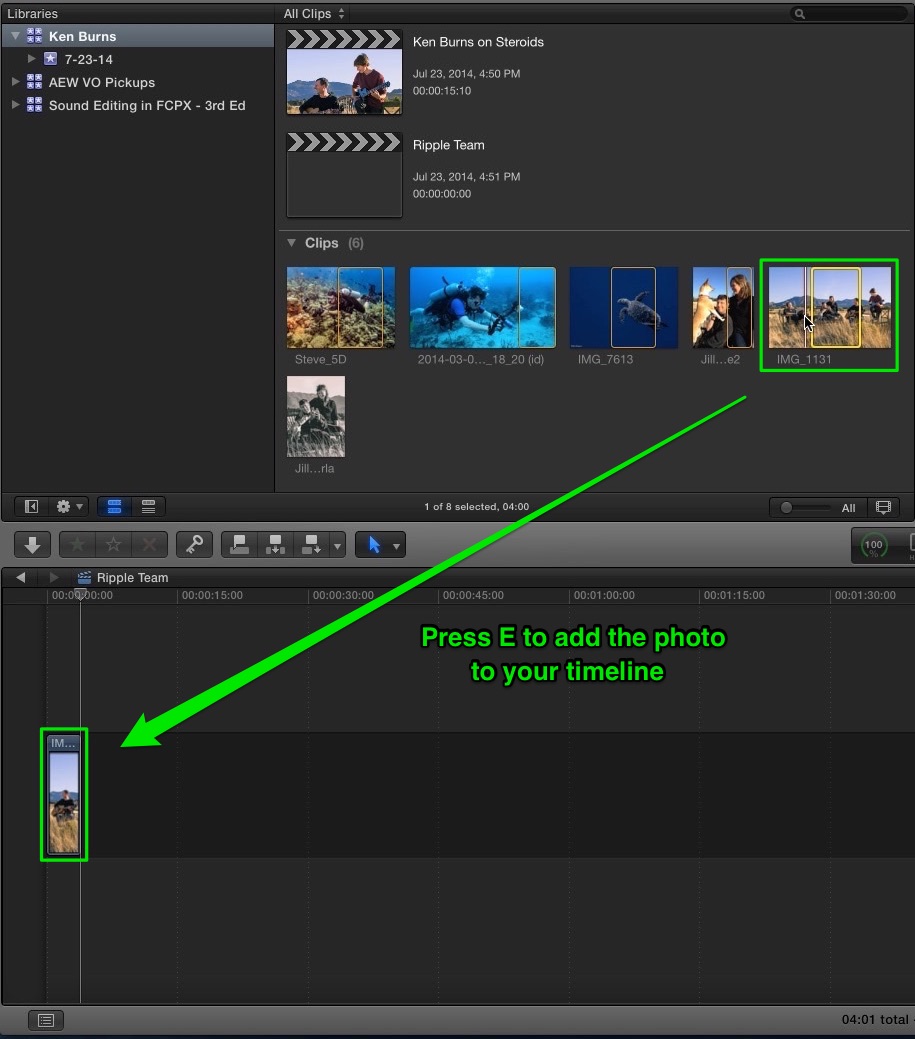
Adding a photo to the timeline in FCP X
Step 2: Verify your Settings
Because there are no other video clips in this timeline, it wants to know the resolution, I’m going to just click OK, press Shift-Z to fit the photo to the timeline window and now we are going to apply the Ken Burns Effect.

Dialog box when adding the picture to the timeline
Step 3: Add the Ken Burns Effect
I’m going to select it, go over to the lower left of the viewer and using this drop down menu, I’m going to choose Crop and I’m going to click the Ken Burns button. For those of you who have used the Ken Burns, you will know you have a start and ending frame.
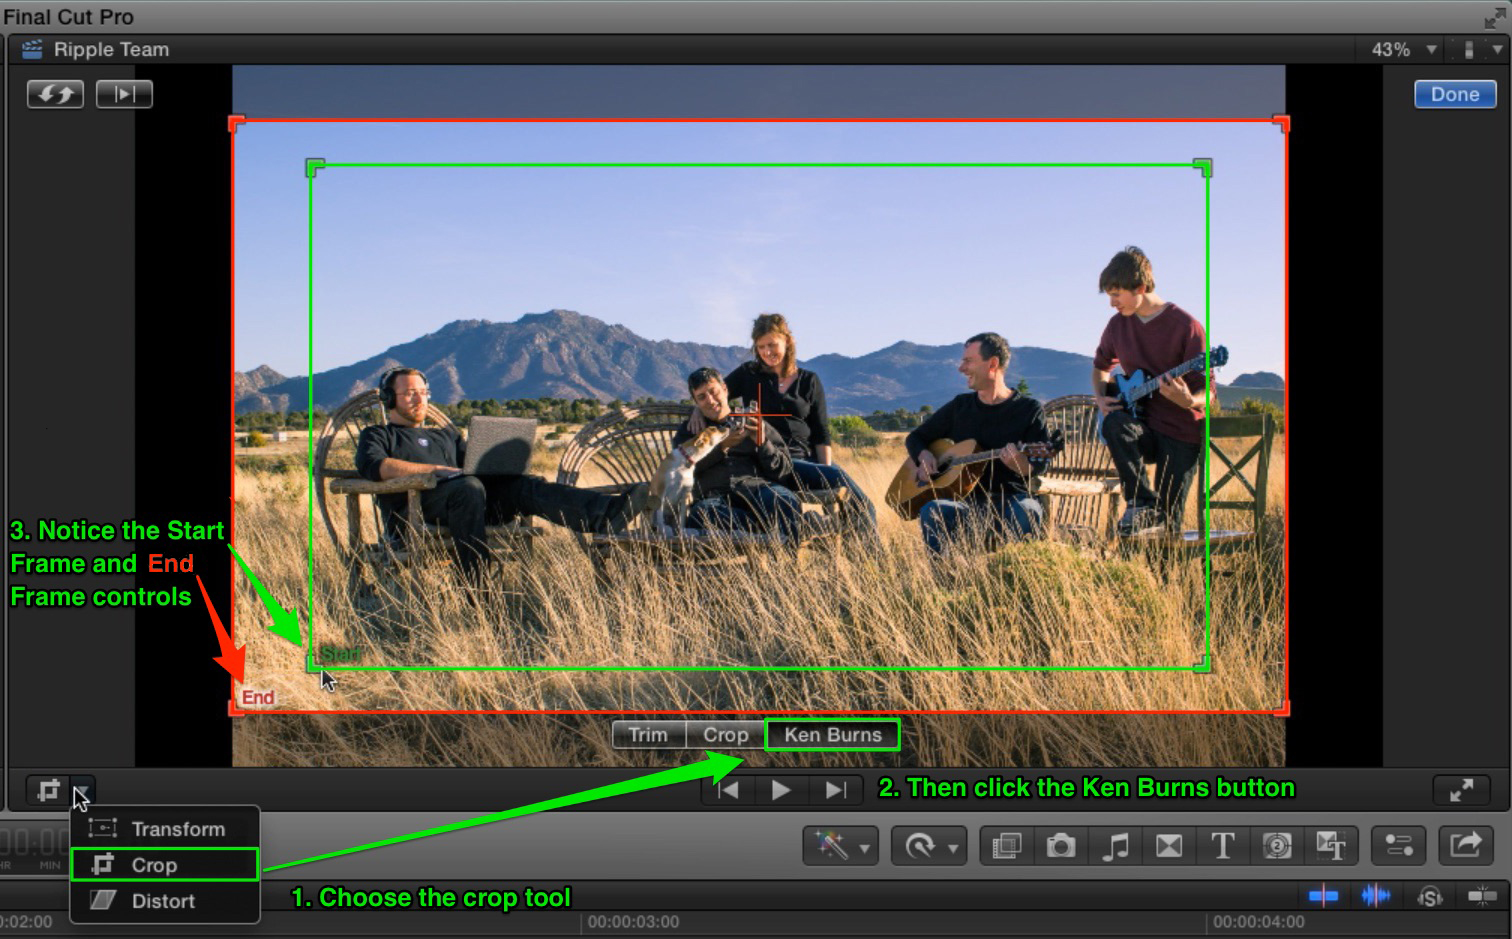
Adding the Ken Burns Effect
Step 4: Adjust your start and end frames
So I am going to go ahead and move the frame over here, set it up right there, looks like good framing and my ending frame, I want set right over Jill and I. We are sitting in the middle of the field. So I have my start and ending frame. If I want to see what this looks like, I can press this little button, click this button and it does a preview of the animation. Perfect!
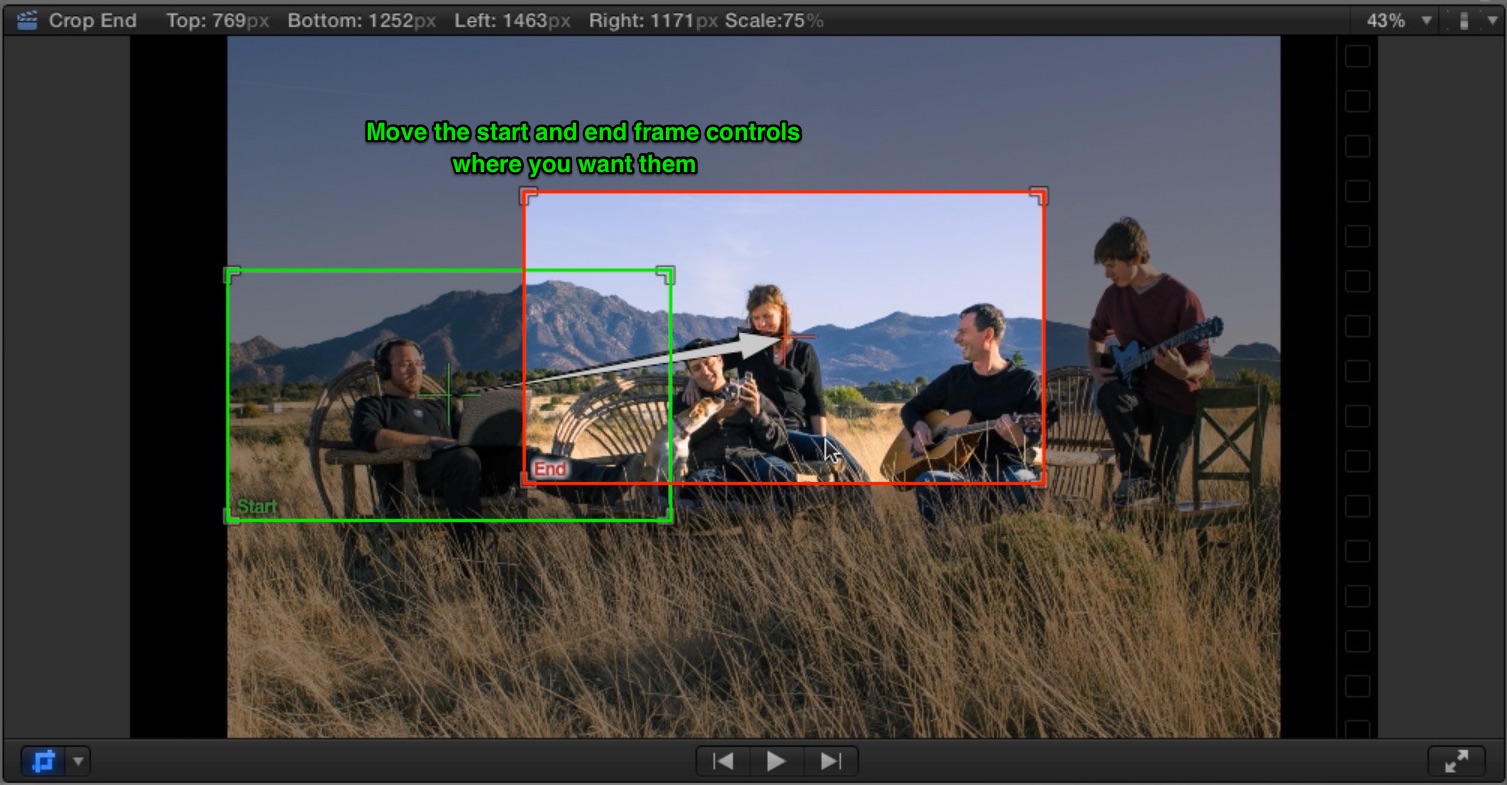
Setting start and end frames for Ken Burns effect
Step 5: Add a Freeze Frame
Now we’re not done. We really need to hold on this shot of Jill and I at the end of the animation. The Ken Burns doesn’t automatically allow you to do that, you have to kind of trick it by creating a freeze frame at the end of the clip so that’s what I’m going to do now. I’m going to press the Down Arrow and then Left Arrow to go to the last frame and press Option-F and that will add a freeze frame that matches the ending frame of the Ken Burns Effect so you can see it just completely will match if I play this through you’ll see that it goes to a nice freeze frame.

Holding the shot with a freeze frame
Step 6: Trim the Length for Desired Speed
You can also adjust the duration of the freeze frame if you want and you can even adjust the speed of the animation for Ken Burns by trimming it here. That’s the thing about Ken Burns, you can control the speed simply by trimming the length you need. So there we go.

Timing the clip to adjust the Ken Burns speed
Step 7: Continue the effect
Now, what we want to do is I want to pan from us over to the two individuals you can’t see off to the right side of the frame, Mark and Zion. To do that, I am going to select this clip and I’m going to copy it, Command-C, I’m going to go to the end of the timeline, press Command-V to paste.

Setting up the pan effect
Step 8: Swap your start and end frames
And, what I need to do is swap the start and ending frame. The reason is this previous frame here, this still is the ending frame and we need it to be the start frame of the next Ken Burns sequence or the next Ken Burns animation.
So I’m going to click the swap button and you’ll notice now the start frame matches the previous frame, the still frame. Now all I need to do is grab this end frame and move it over to where I want it and in this case, right over Mark and Zion and I’ll go ahead and preview it to see how it looks. Perfect!

Moving the ending frame
Step 9: Trim it and freeze it again
Maybe it’s a little fast or a little slow, I can go ahead and adjust it if I want and then also what I want is to do is a freeze frame at the end. So make sure I’m at the end of the sequence and press Option-F and now I have a freeze, let’s click Done and I’m going to set that and now it freezes right there on Zion and Mark.

Adding another freeze frame
Step 10: End on a wide shot
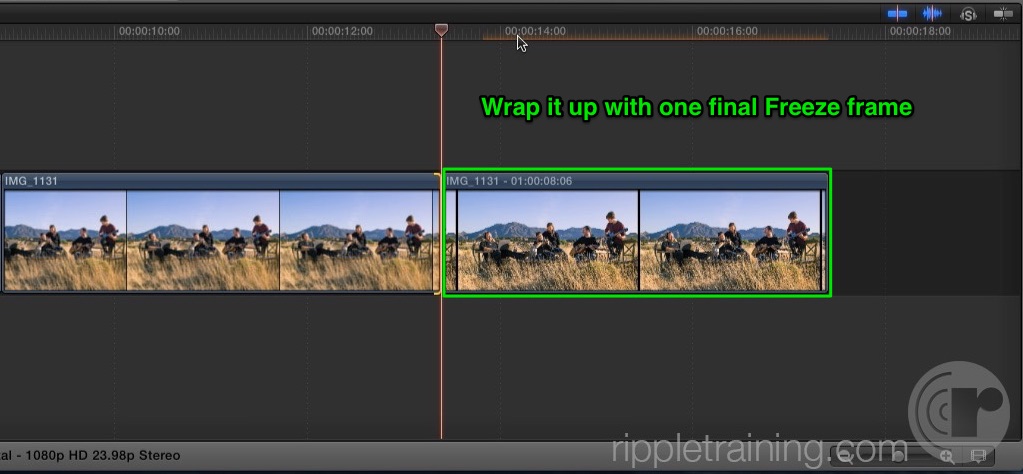
So, one last thing I want to do. I want to widen out to see everyone in the shot. I’m going to go ahead and copy this clip. Go to the end of the sequence, Command-V to paste, select the clip, make sure Ken Burns is turned on and I’m going to set the swap end and start frames-swap them and I’m going to go ahead and set the ending frame for the entire group.
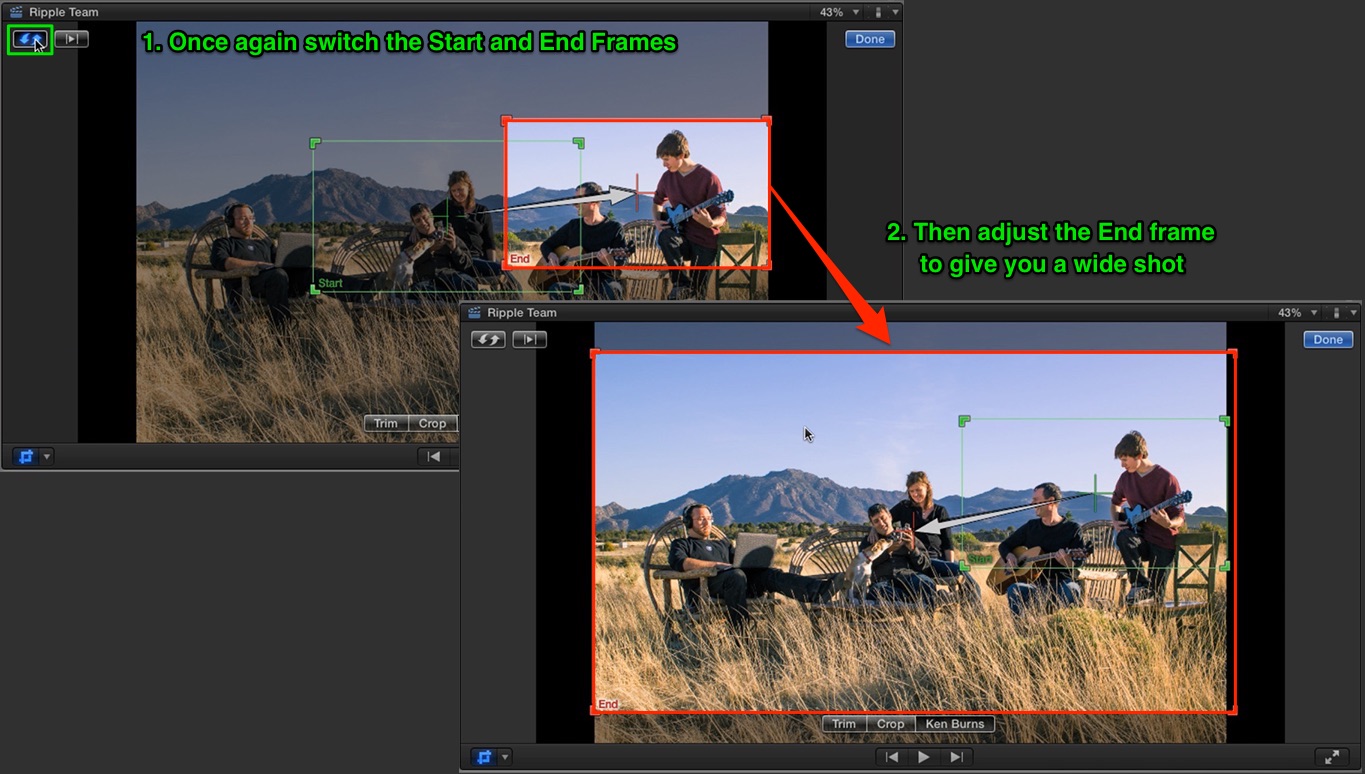
Ending on a wide shot
Step 11: Putting on the finishing touches
I’m going to preview that and see how that works. A little fast, so what I need to do is to trim it, make it longer, trim it out and pull out some of the frames there. What that will do is make the animation happen a little bit longer and maybe that’s taking a little bit too long so I will just move my playhead over here and press Option-] and I’ll do a freeze frame there because the playhead is already parked there. So I will press Option-F. I will press Shift-Z to zoom out, go back to the beginning of the timeline and we’ll play it back. And there you have it.
Magical. This is the way to do it kids.


