Are you looking for updated movies for the lastest version of Final Cut Pro X?
Click here to see FCP 10.4
Final Cut Pro 10.3 Free Trial Tutorial
Importing Media in Final Cut Pro X
In the previous lesson we covered downloading the Final Cut Pro X free trial from Apple’s website and briefly looked at the Final Cut Pro X interface. In this video we’ll look at how to import media and preview it in the Viewer.
Libraries and Events in Final Cut Pro X
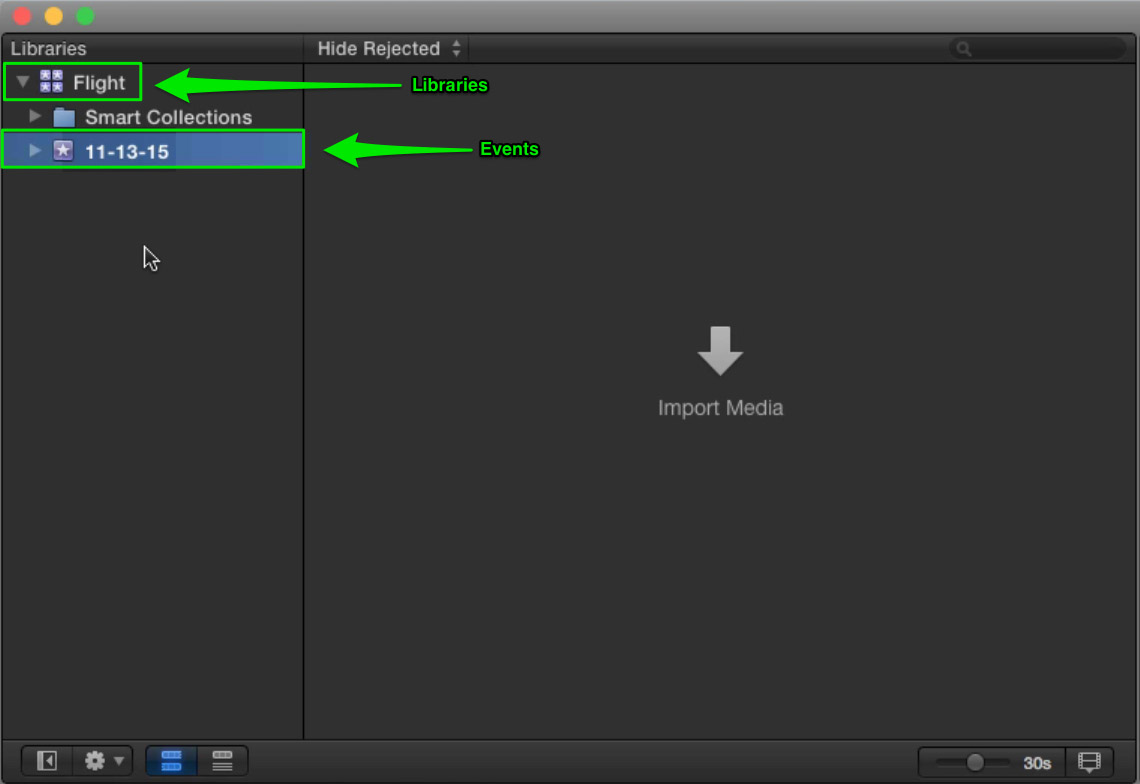
You’ll notice a purple 4-starred icon in the upper left of the interface. This is a Library. Libraries store Events which contain media and projects. Before importing your media, it’s a good idea to rename your Library. Click on the name and enter Flight.
All Libraries contain one Event. An event is like a folder for organizing your media. You can create more than one event, but for the simple project we’ll be creating, you only need this one.
Downloading the Free Project Media
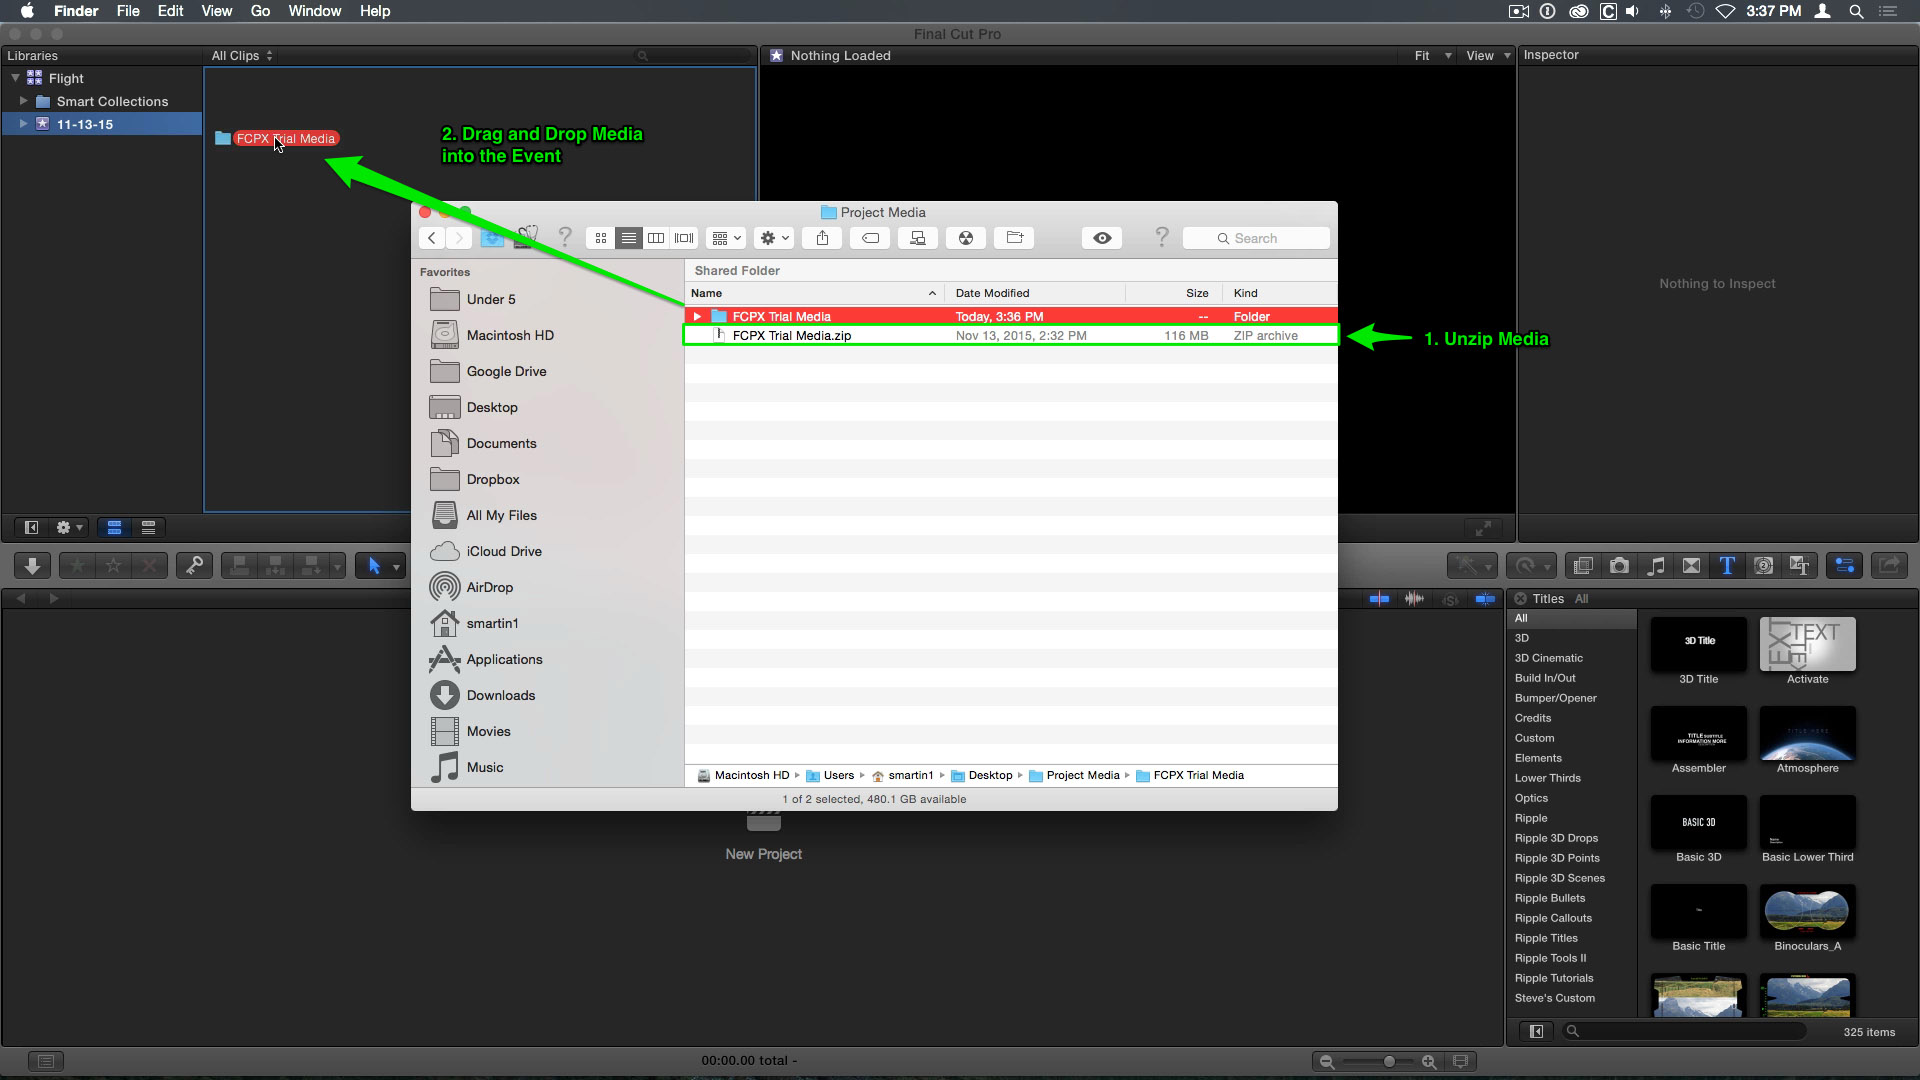
Before we go any further, make sure you have downloaded the free project media. A .zip file titled FCPX Trial Media will download to the location you have specified in your Browser’s preferences. Once the download is complete, locate and double click the file to uncompress it. The folder contains some video clips and a music file.
Importing Media
With Final Cut Pro still open and the Event selected, drag the FCPX Trial Media folder into the Browser. Doing this will copy all of the media into your Library. Because the media is copied into the Library you no longer need the folder of media and you can trash it if you wish. The media you imported appears as separate images called filmstrips in the Browser.Next, Final Cut informs you of changes that have been made to the software in the latest version. Click continue.
The Media Browser
Previewing Clips
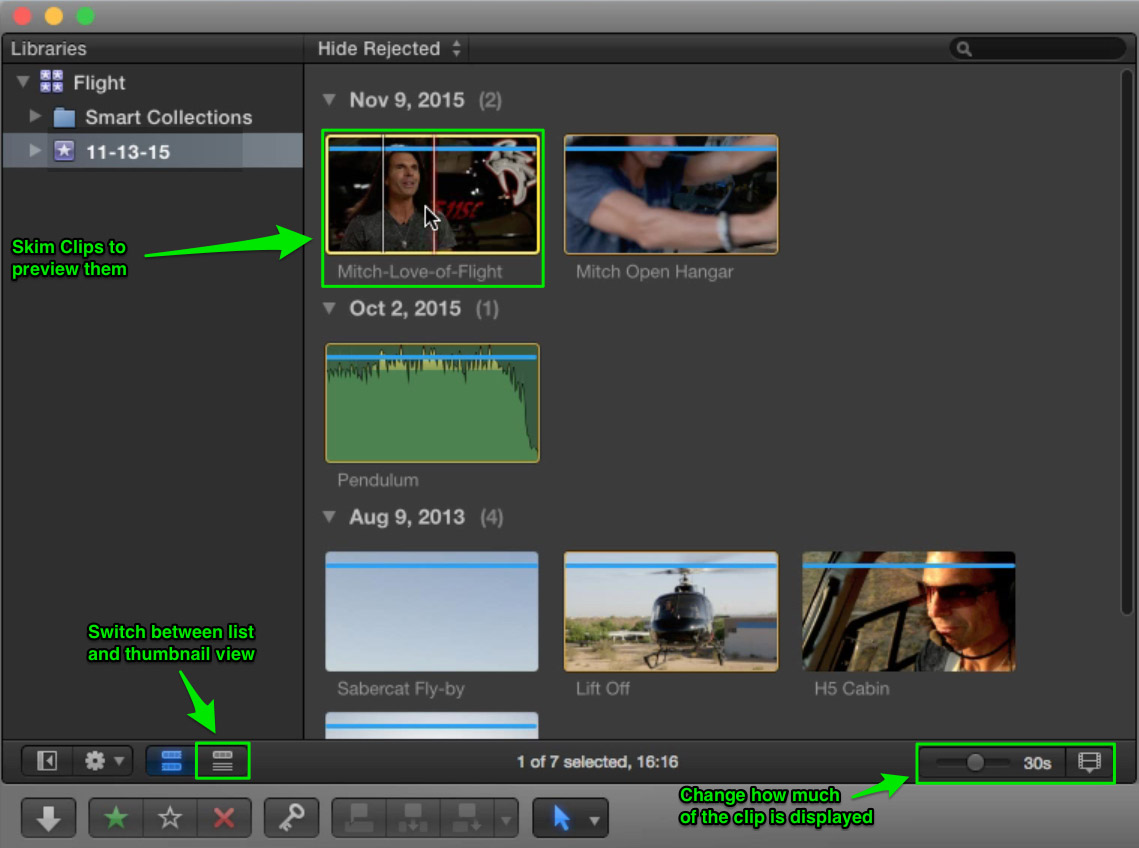
You can now take your mouse pointer and Skim over each filmstrips to view the contents of the clip in the Viewer. Skimming is a fast way to view all the video in your Browser. To play any clip from the skimmer position, press the spacebar. Press the spacebar again to stop playback.
The Duration Slider
At the bottom right of the browser you can drag on the Duration slider to show a larger portion of the clip. More filmstrip images appear the further you drag to the right. To show less images drag to the left.
List View
To see more information about each clip, you can click this button to switch to List View. This view has the additional benefit of displaying each clip’s metadata in columns that include duration, starting timecode and so on.
When a clip is selected, a Filmstrip appears at the top of the browser. You can skim over the Filmstrip to preview the content in the viewer, and press the Spacebar for playback. While playing back, pressing the Down Arrow loads the next clip in the list and continues to playback. In the next video we’ll begin the process of creating a movie.
This is Lesson 2 of our free Final Cut Pro X tutorial. If you are enjoying this tutorial, show us your appreciation by sharing!
- Lesson 1: Getting Started with the Final Cut Pro X Free Trial
- Lesson 2: Importing Media into Final Cut Pro X
- Lesson 3: Adding Clips in Final Cut Pro X
- Lesson 4: Trimming in Final Cut Pro X
- Lesson 5: Working with Sound in Final Cut Pro X
- Lesson 6: Adding Titles & Transitions in Final Cut Pro X
- Lesson 7: Adding Effects in Final Cut Pro X
- Lesson 8: Sharing your Movie in Final Cut Pro X

