NEW 12.5 WORKFLOW! We have updated this article for the 12.5 Resolve workflow, please only use the steps below when using Resolve 12.0.
-Ripple Training
In this article, I’m going to walk you through the steps on how to send your Final Cut Pro X project to DaVinci Resolve 12 for color grading, then send your graded project back to Final Cut Pro X. Make sure you are using the latest version of Final Cut Pro X and DaVinci Resolve; as of this writing I am using Final Cut Pro 10.2.2 and Resolve 12.
Start with your timeline in Final Cut Pro
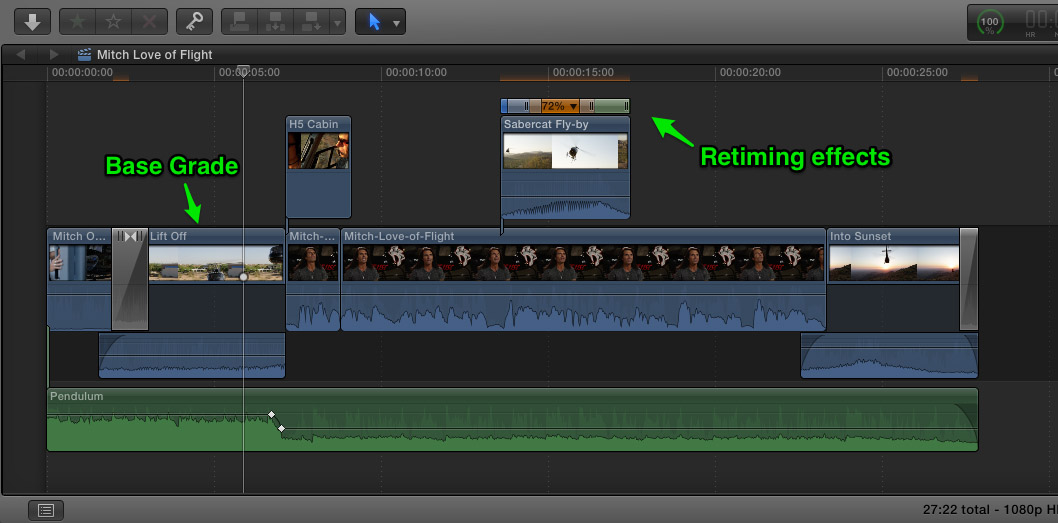
Here is a simple timeline, that contains an interview clip, a couple of connected b-roll shots, a music track and a few transitions.
Export your XML from Final Cut Pro X and Create a New Project in DaVinci Resolve 12
One of the clips has a retiming effect applied, and a few of the clips have been color graded to improve the contrast and color balance. This step is only important if the person grading your program will be someone other than yourself and you feel the need to give him or her a timeline with a base grade to communicate your ideas. Grades that are sent to Resolve can be adjusted further, turned off, or removed altogether by the colorist.
You should also be aware that not every color adjustment will transfer to Resolve. Exposure, Saturation and Color changes in the Color Board will transfer, but secondary corrections using Color or Shape Masks will not. With Resolve’s powerful windows and curves, you probably want to create your secondary corrections in Resolve anyway.
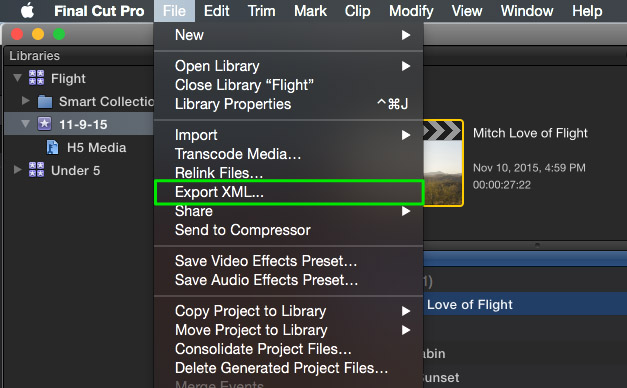
To send your project to DaVinci Resolve, Press Command-2 to make the Timeline active, or just select the project in the Browser. Then, from the File menu choose > Export XML. Name and save the file to your hard drive.
Launch DaVinci Resolve 12 and Log In. From the Project Manager window, click the New Project button and name your Project. Click Create.
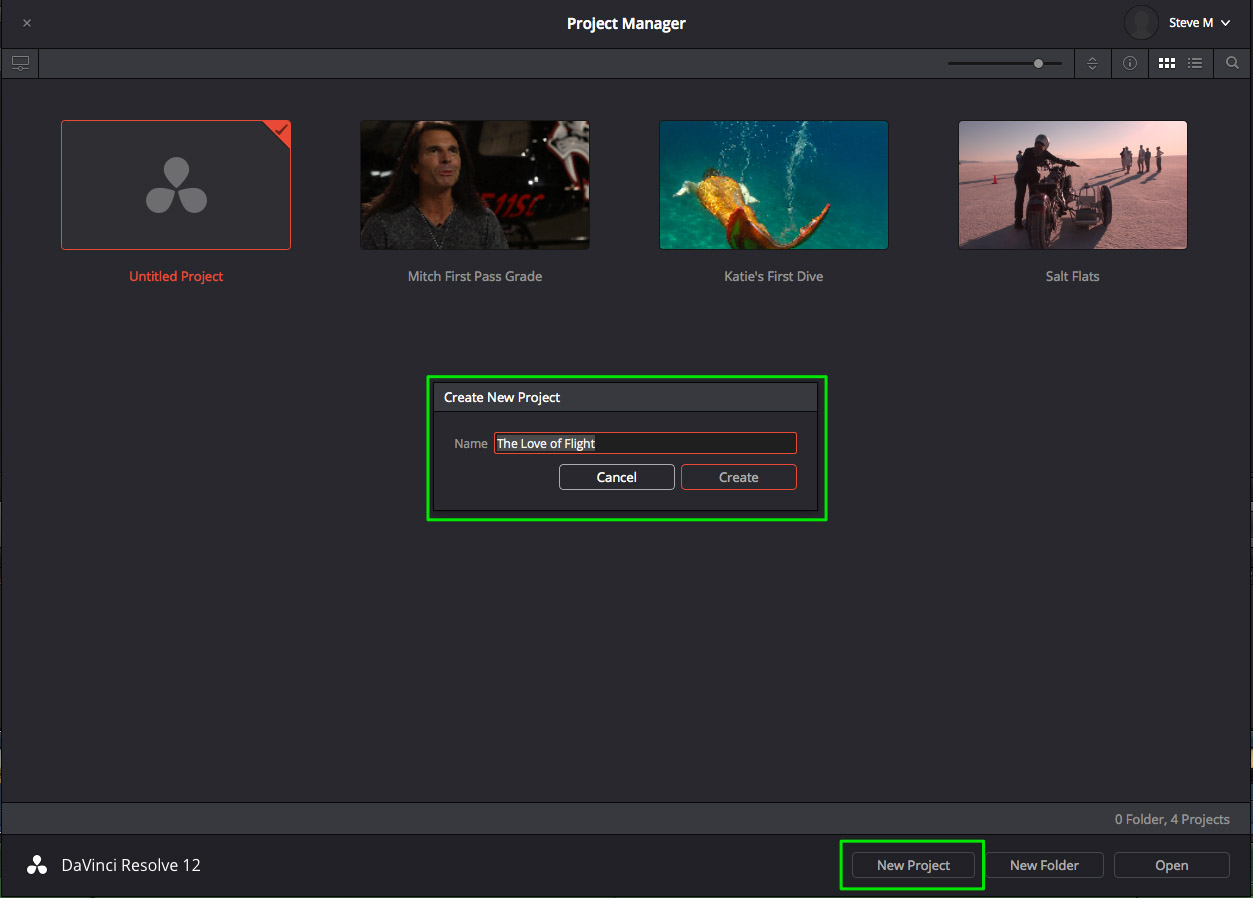
Import the XML into DaVinci Resolve 12
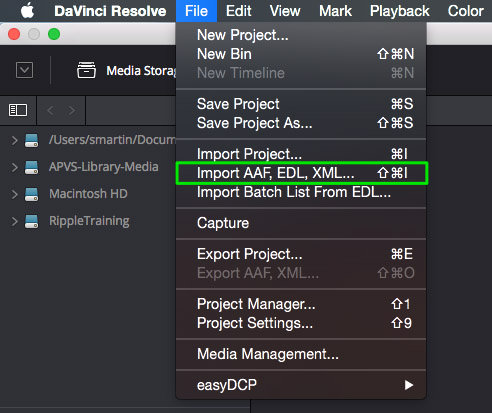
Once the Project is created, double-click the Project tile (the one with an orange border), to open it. Resolve will appear with an empty Media Pool and Timeline. From the File Menu, choose > Import AAF, EDL, XML…(or press Shift-Command-I).
Navigate to the XML File you exported from Final Cut Pro X, then open it. The Load XML Window will appear. There are a few important settings you will want enabled. Automatically set project settings, will ensure that Resolve’s master project settings match the project settings of the Final Cut Pro X timeline you are about to import. So if you are importing a 1920×1080, 23.98 FPS Project from FCP X, the Master Project Settings panel will reflect these settings once the timeline is imported.
The next option, Automatically import source clips into the media pool will import clip into the media pool that match the clip name, reel and timecode of the corresponding clips in the timeline you are importing. If you’ve created a primary grade on your clips in Final Cut Pro X and you want them to appear in Resolve, make sure to enable Use color information. By the way, Final Cut Pro X is the only NLE that sends the color information to Resolve. Click OK.
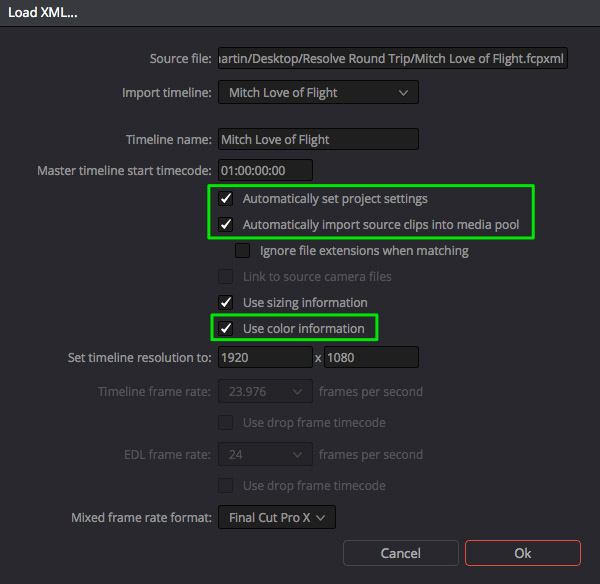
If you are importing an XML from a Final Cut Pro X project that contains clips with mixed frame rates, choose Final Cut Pro X from the Mixed frame rate format pop up. NLE’s have different methods for calculating clips with differing frame rates, and choosing this option will ensure the most accurate timeline conform. It’s also important to choose this setting before you import. Once the Media Pool is populated with clips it can no longer be changed.

Help DaVinci Resolve locate & import the source clips
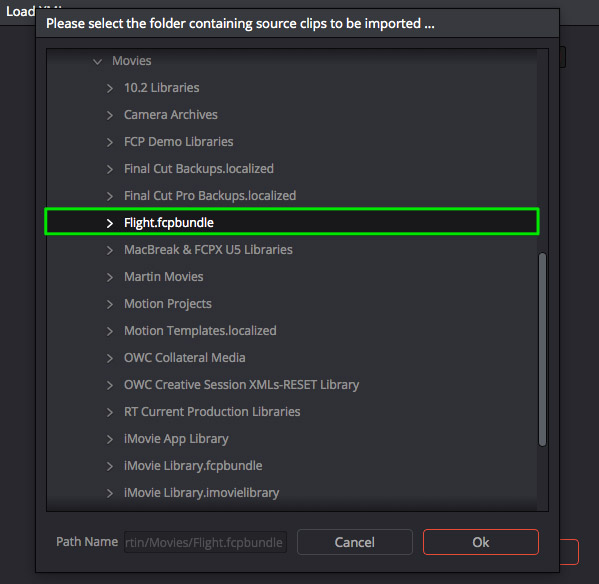
The next step is a bit wonky. I would expect Resolve to automatically find the media in the Final Cut Pro Library or external media folder it resides in, but alas, it does not so you’ll need to tell it where to look. Click Yes.

If you imported an XML file that references a managed Library, you’ll need to navigate to the Library on your hard drive and select it. If you imported an XML file that references media in an external folder, you’ll want to navigate to that folder and select it. Below I’ve selected a managed library in the Movies folder of my local hard drive. Click OK.
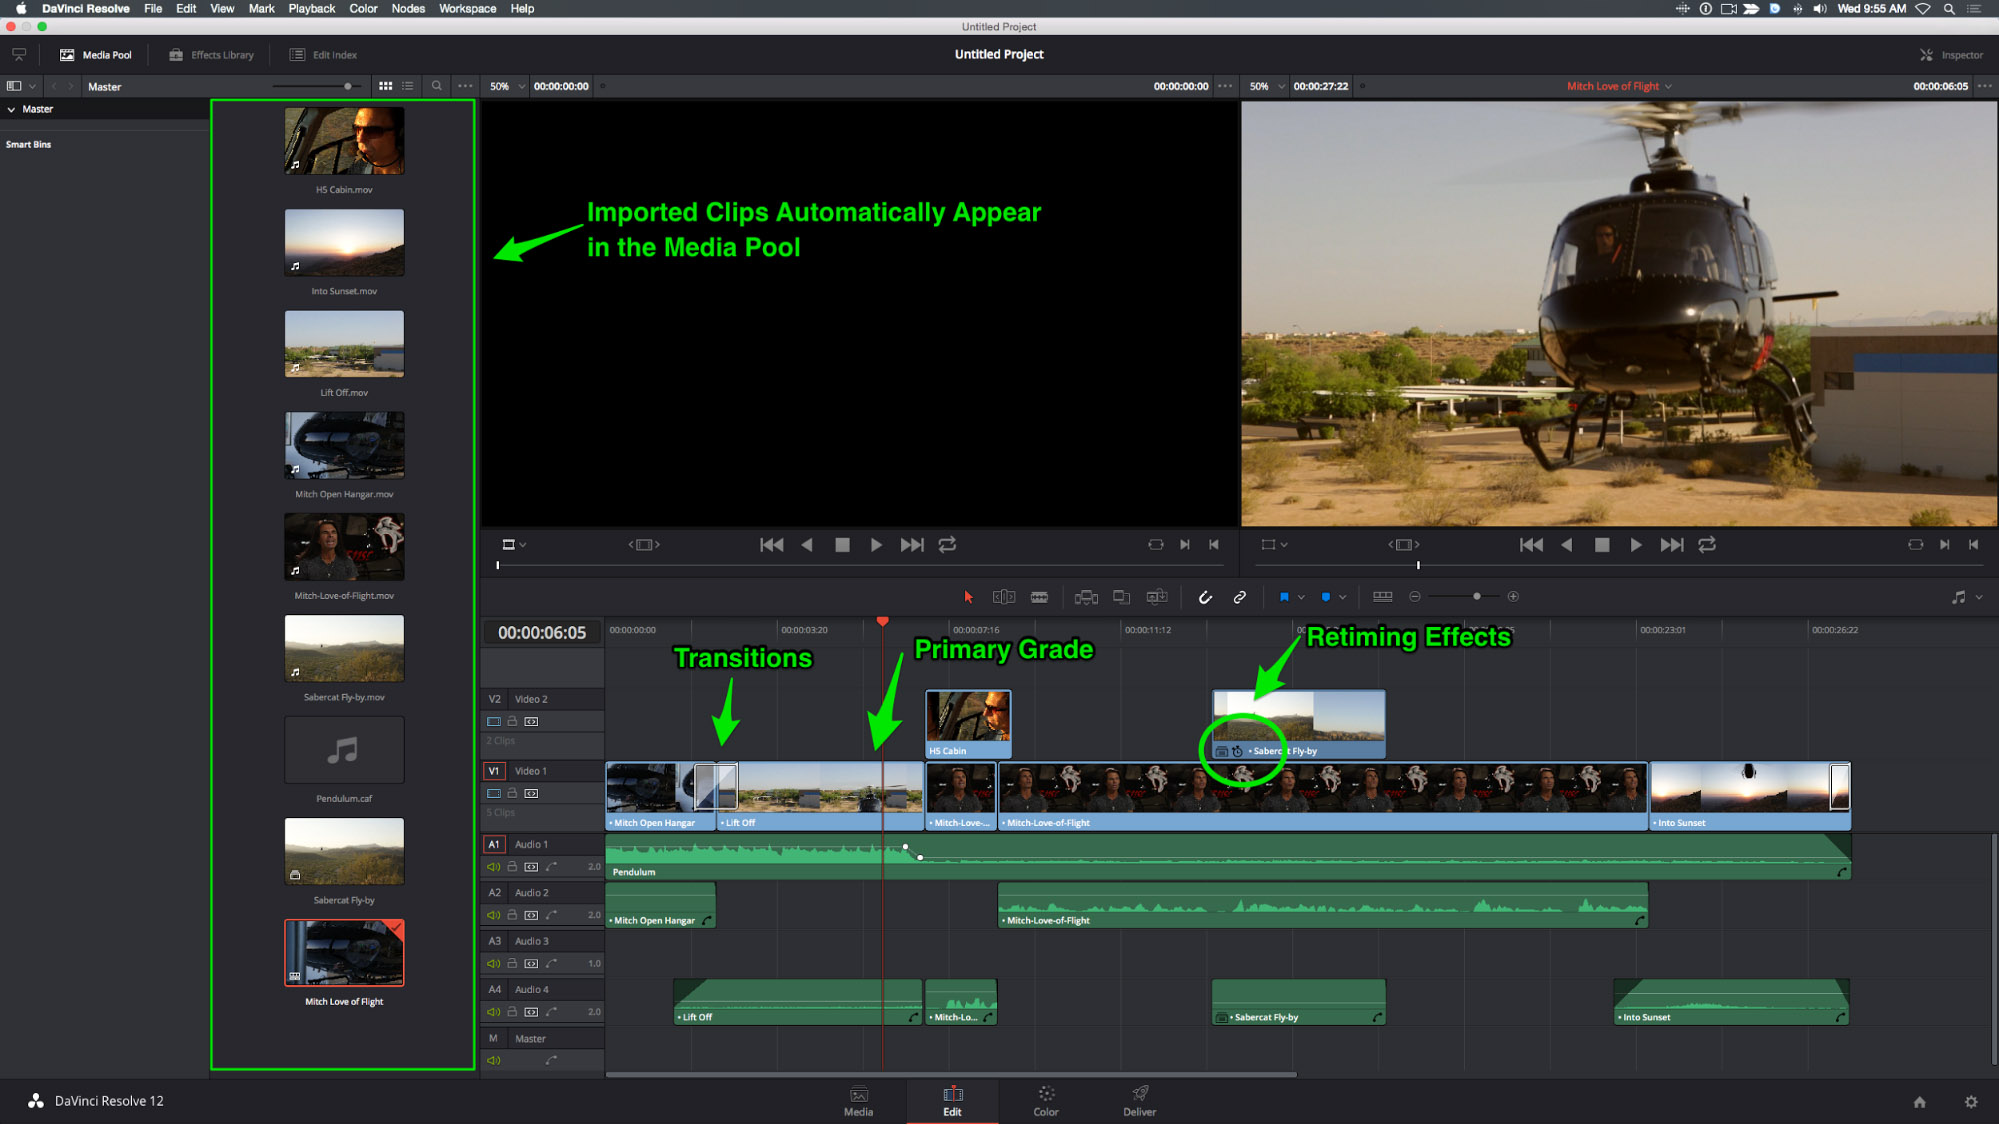
The Project automatically populates with clips in the Media Pool and a timeline that matches the edit you exported from Final Cut Pro X.
Export the XML out of DaVinci Resolve 12
At this point, you can switch over to the Color Page in Resolve 12 and begin grading your clips. Assuming you’ve made all the changes you want to make in Resolve, it’s now time to send the project back to Final Cut Pro X. Switch over to the Deliver Page. In the Render Settings Panel, reveal the Render presets. Choose Final Cut Pro XML Round-Trip and click Load.
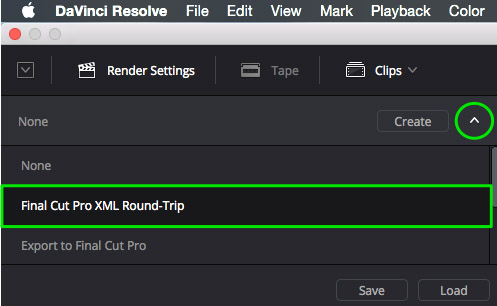
Selecting this option will load the appropriate video format, resolution and audio information specific to Final Cut Pro X projects. At this point, you only have two things to decide: what codec you want your timeline clips rendered into, and where on your hard drive you want these files rendered to.
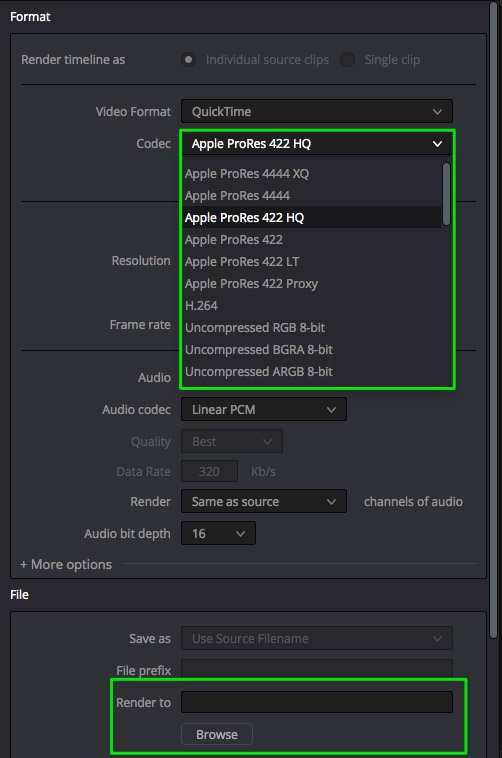
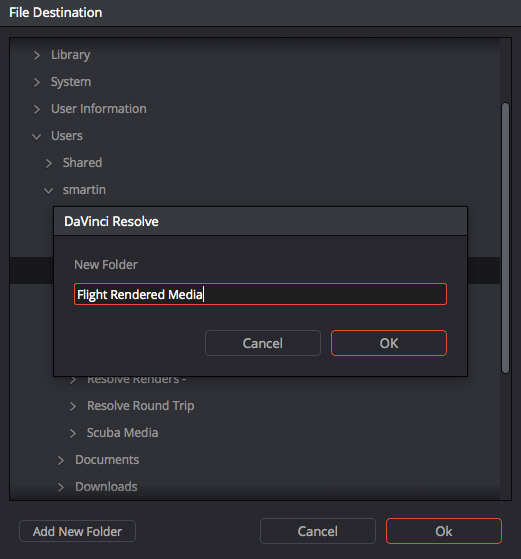
To choose a location for your rendered media, click the Browse button, navigate to the location you want to store your rendered media, click the Add New Folder button, then give the folder a meaningful name. Click OK and OK again to dismiss the File Destination window.
To add all the clips to the Render Queue, click Select All Clips, then Add to Render Queue.
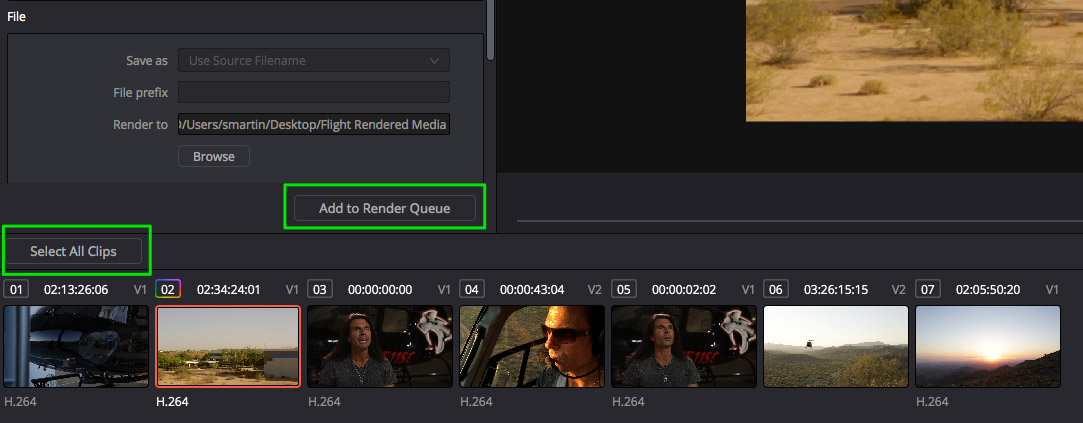
Finally, in the Render Queue, select the Job, then click Start Render.

Import the XML back into Final Cut Pro X
Back in Final Cut Pro X, select the Library you want to import the Resolve project into, then from the Film menu choose > Import XML
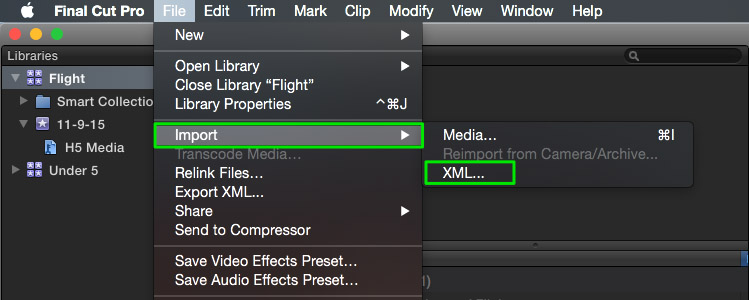
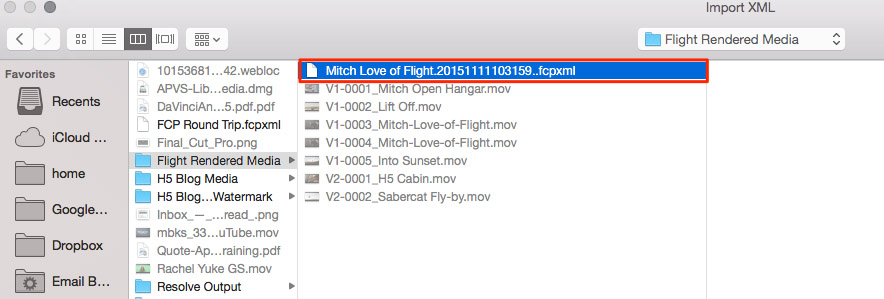
Navigate to the folder you selected for your rendered media. Inside the folder will be an XML file created by Resolve. Select it and click Import.
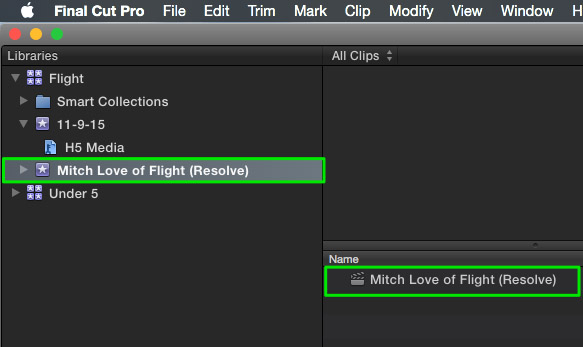
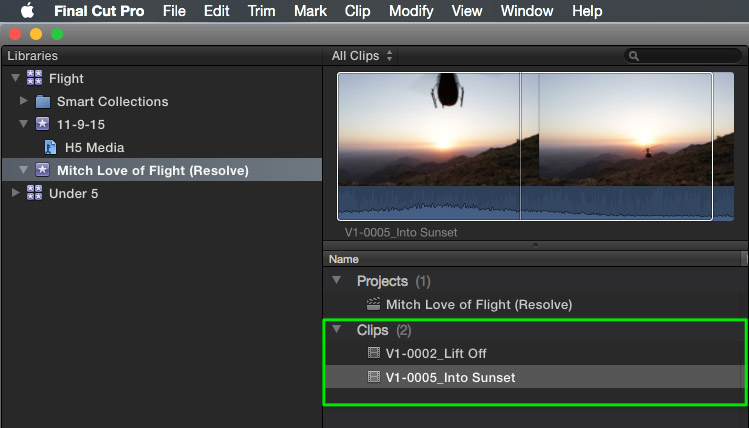
Final Cut Pro X will create a new Event in the Library you targeted and append the name with (Resolve). In the Browser you’ll find the Resolve Project. Notice that no media is imported into the Browser. The assumption is, you are finished editing and all you want to do is output.
Accessing the media after it has been re-imported into Final Cut Pro X
If you do need access to the rendered media in the Browser, park your playhead over any clip in the Timeline and press Shift-F. I should also point out that this round-trip workflow is a one-way street; meaning, that you can send your Final Cut Pro X grades to Resolve for further manipulation, but you cannot manipulate the grades sent from Resolve to Final Cut Pro X. The media that constitutes the imported timeline is essentially your color grades baked into the media.
If you’re interested in learning DaVinci Resolve, we have some great training that will make the entire experience easy and enjoyable. Check out our DaVinci Resolve learning path, where we have tutorials built in a planned series working from beginner to advanced.





Hi Steve can you please let us know about the correct settings in a little more detail. I have trouble on the reimport to FCPX (from resolve) my clips are all way too dark when I open in FCPX. I thought this was the auto, video, data tab at first, but it isn’t. I have not found anything that helps me understand what on earth is going on. Is it gamma settings?Perhaps it’s on the export. Can you resolve this? ( a hopeless pun, in the vain hope of a solution….)
Anybody find a solution with Sony A7sII files? I cannot find a solution anywhere!! And I do not want to use Clipwrap to convert all my sony files to pro res HQ before importing to FCPX.
I am sure I am not the only person that wants to edit A7sII files from FCPX in DaVinci. My assistant does it through premiere exporting a proves HQ .mov file then using scene cut detection to divide them up again. Anybody have any suggestions please.
Thanks!
Hello steve… i’ve got a question for you… im grading some videos but the result is not the expected… the video im trying to correct is already one clip only… i don’t have the separated clips so i cut out every scene in the exact fames where the image change, but the new regions take the last frame of the previous one so the color grade makes jumps… how can i correct this?
Aspect ration of fcpx proj is 16:9. When I import xml to davinci, I watch 4:3 one. “use sizing information” was checked before import. davinci is davinci as and always)
Hi Steve, big problem for me importing xml from fcpx. I follow the same steps as you but when I load my xml into resolve I have the classic message “46 of 46 clips not yet found”. If I load the “library” the clips are found but lot of clips in my timeline and in media folder stay offline. The problem is that if I click “reveal in media” the right clip is selected and if I click on “reveal in finder” the right clip is selected too so the path is apparently correct. Moreover my clips are stored in an external HD (when I imported them into fcpx I selected “leave the clips on place” but resolve finds more clip if I select the fcpx library. If I select the folder where every original clip is stored, resolve find nothing at all..the 46 clips are still not found.
Last test I did was create a totally new library on fcpx and import the xml inside this new library and everything’s fine and well linked in fcpx so the problem is not the xml or the medias…
Other information: after the xml import, in my media storage I have only 13 offline clips (even if every clip point in the right media folder) but in the timeline I have 46 offline clips.
Hi steve, I still have the same problem, that I haven’t been able to navigate videoclips, I already move my clips to my hard drive, but still won’t work, could you make another video to walkthrough this problem?
Thank you
Hello Steve, Thank you for the tutorial, very helpful. I have a question though, I am working using an external drive, that holds the FCPX project and media files. So far I haven´t been able to locate the video clips at the moment of importing the XML. Is there a way or will I need to move everything to my hard drive?
Hi Jose,
did you ever come across a solution? I’m currently facing the same problem.
Thanks Steve. Nicely done as always. Another color function that doesn’t seem to translate from FCP is Balance Color. Didn’t test, but suspect match color won’t carry over either.
Steve – what a fantastic and concise article. I’ve battled for a long time with this in older versions of resolve and pretty much gave up.
I followed your instructions to the letter thinking “here we go, another crazy idea” and to my relief, it worked first go, and second, and third 🙂 Very very pleased thank you.
What I do still find persistently annoying is, files have been inexplicably renamed – any thoughts on how to fix this? Ultimately, I’d like to work in 2.5K raw, hand off prores versions to my FCPX guy then reimport his “edit” for grading from the 2.5K source….
John, I use 2.5k raw and just successfully sent my edited timeline (using h264 temp files) back to resolve, linked it up with my raw files, graded it then sent it back to Final Cut Pro. I had to check a box when importing into Resolve to ignore file extensions so the raw files could be linked. The only problem I found was that my one sound synced clip didn’t re-link back in Final Cut Pro. I’m not sure why yet.