
In this article, I’m going to walk you through the steps on how to send your Final Cut Pro X project to DaVinci Resolve 12.5 for color grading, then send your graded project back to Final Cut Pro X. Make sure you are using the latest version of Final Cut Pro X and DaVinci Resolve. As of this writing I am using Final Cut Pro 10.2.3 and Resolve 12.5.1.
Start with your timeline in Final Cut Pro
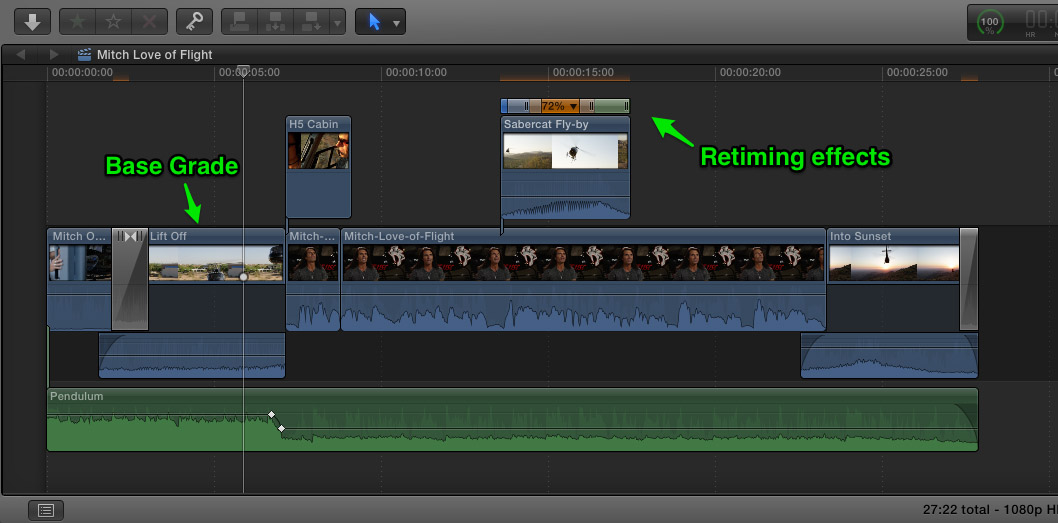
Here is a simple timeline, that contains an interview clip, a couple of connected b-roll shots, a music track and a few transitions.
Export your XML from Final Cut Pro X and Create a New Project in DaVinci Resolve 12.5
One of the clips has a retiming effect applied, and a few of the clips have been color graded to improve the contrast and color balance. This step is only important if the person grading your program will be someone other than yourself and you feel the need to give him or her a timeline with a base grade to communicate your ideas. Grades that are sent to Resolve can be adjusted further, turned off, or removed altogether by the colorist.
You should also be aware that not every color adjustment will transfer to Resolve. Exposure, Saturation and Color changes in the Color Board will transfer, but secondary corrections using Color or Shape Masks will not. With Resolve’s powerful windows and curves, you probably want to create your secondary corrections in Resolve anyway.
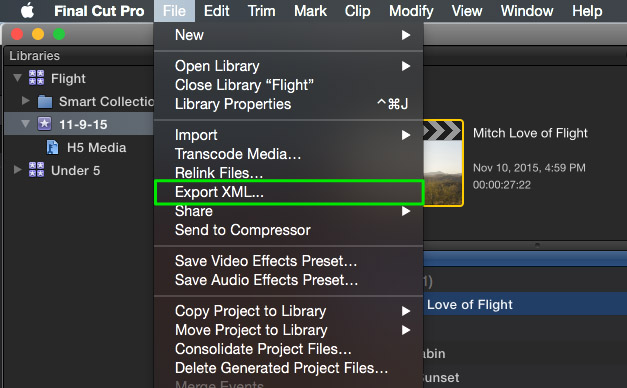
To send your project to DaVinci Resolve, Press Command-2 to make the Timeline active, or just select the project in the Browser. Then, from the File menu choose > Export XML. Name and save the file to your hard drive.
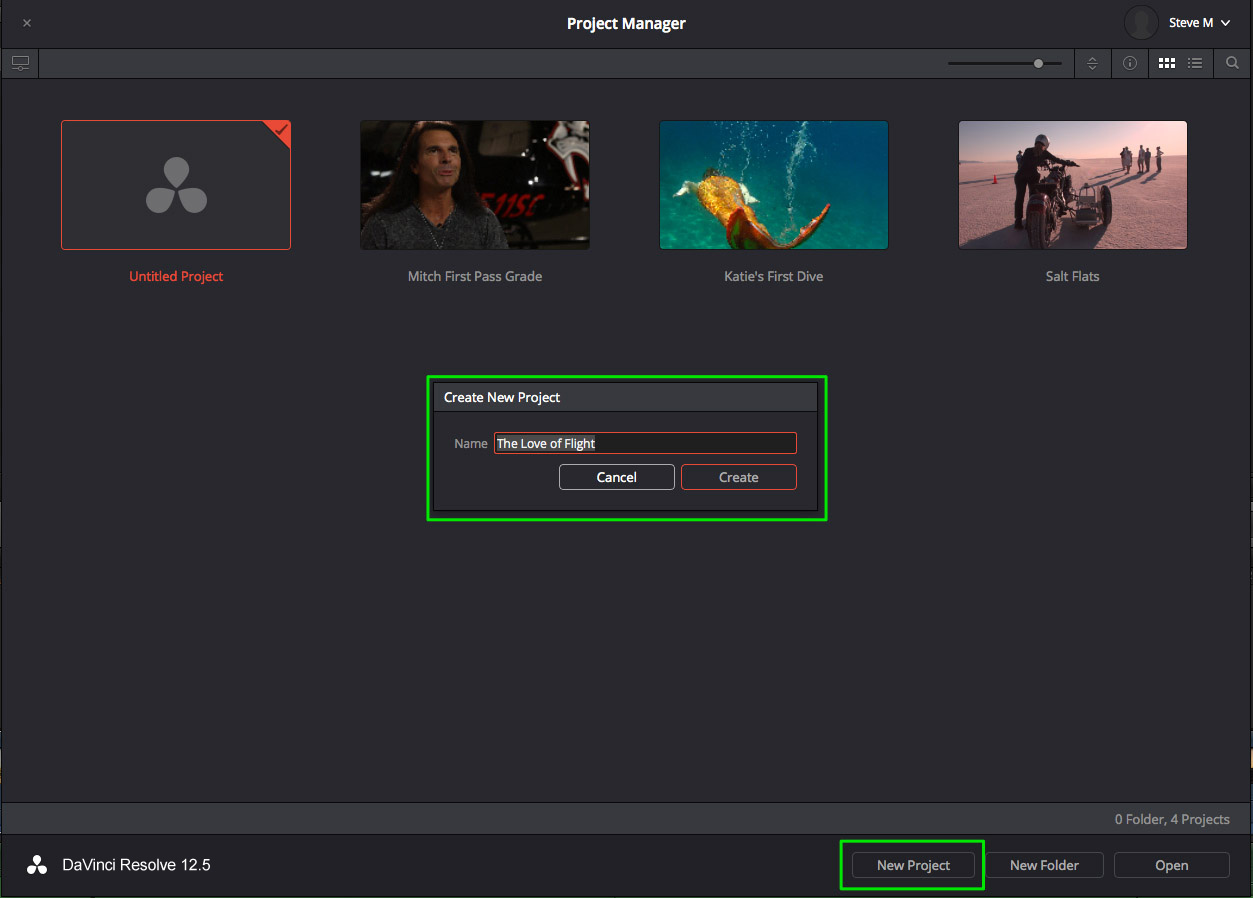
Launch DaVinci Resolve 12.5.1 and Log In. From the Project Manager window, click the New Project button and name your Project. Click Create.
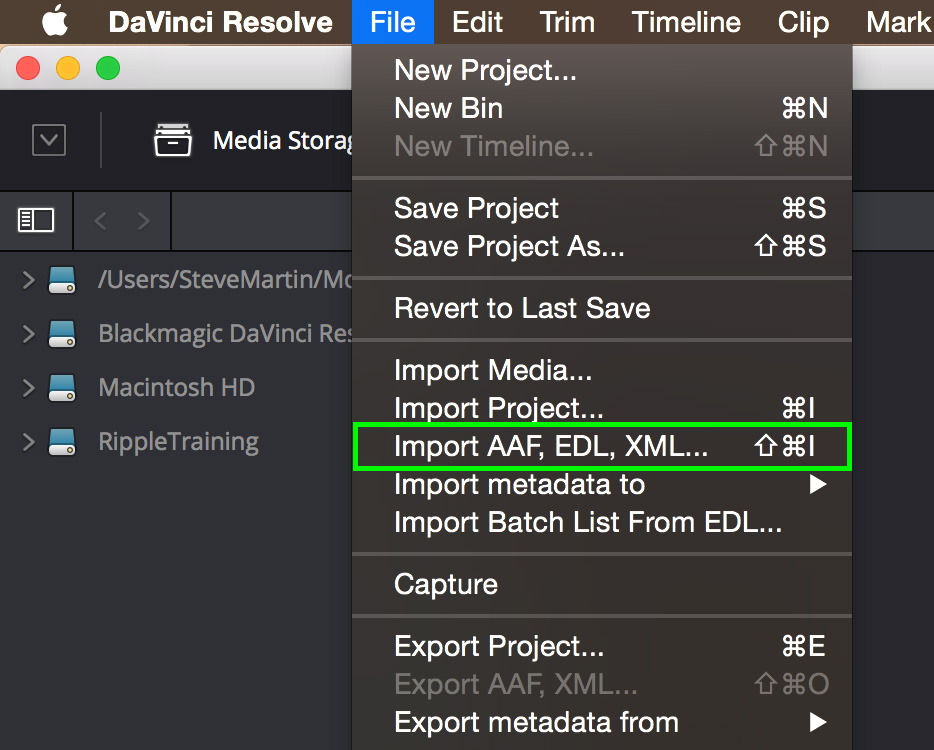
Navigate to the XML File you exported from Final Cut Pro X, then open it. The Load XML Window will appear. There are a few important settings you will want enabled. Automatically set project settings, will ensure that Resolve’s master project settings match the project settings of the Final Cut Pro X timeline you are about to import. So if you are importing a 1920×1080, 23.98 FPS Project from FCP X, the Master Project Settings panel will reflect these settings once the timeline is imported.
The next option, Automatically import source clips into the media pool will import clips into the media pool that match the clip name, reel and timecode of the corresponding clips in the timeline you are importing. If you’ve created a primary grade on your clips in Final Cut Pro X and you want them to appear in Resolve, make sure to enable Use color information. By the way, Final Cut Pro X is the only NLE that sends the color information to Resolve. Click OK.
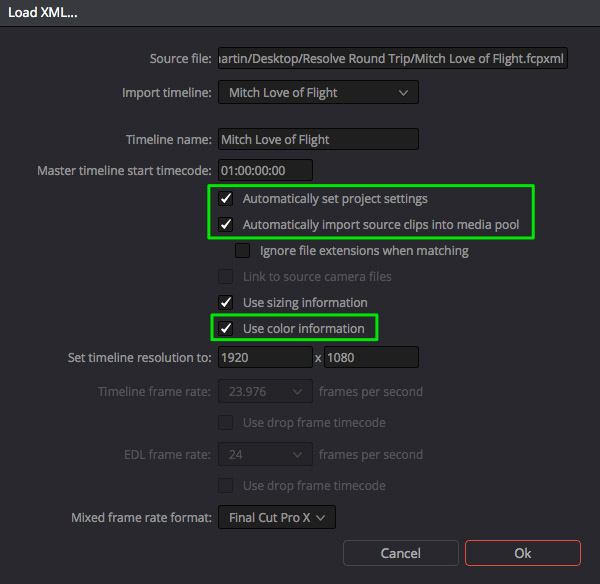
If you are importing an XML from a Final Cut Pro X project that contains clips with mixed frame rates, choose Final Cut Pro X from the Mixed frame rate format pop up. NLE’s have different methods for calculating clips with differing frame rates, and choosing this option will ensure the most accurate timeline conform. It’s also important to choose this setting before you import. Once the Media Pool is populated with clips it can no longer be changed.

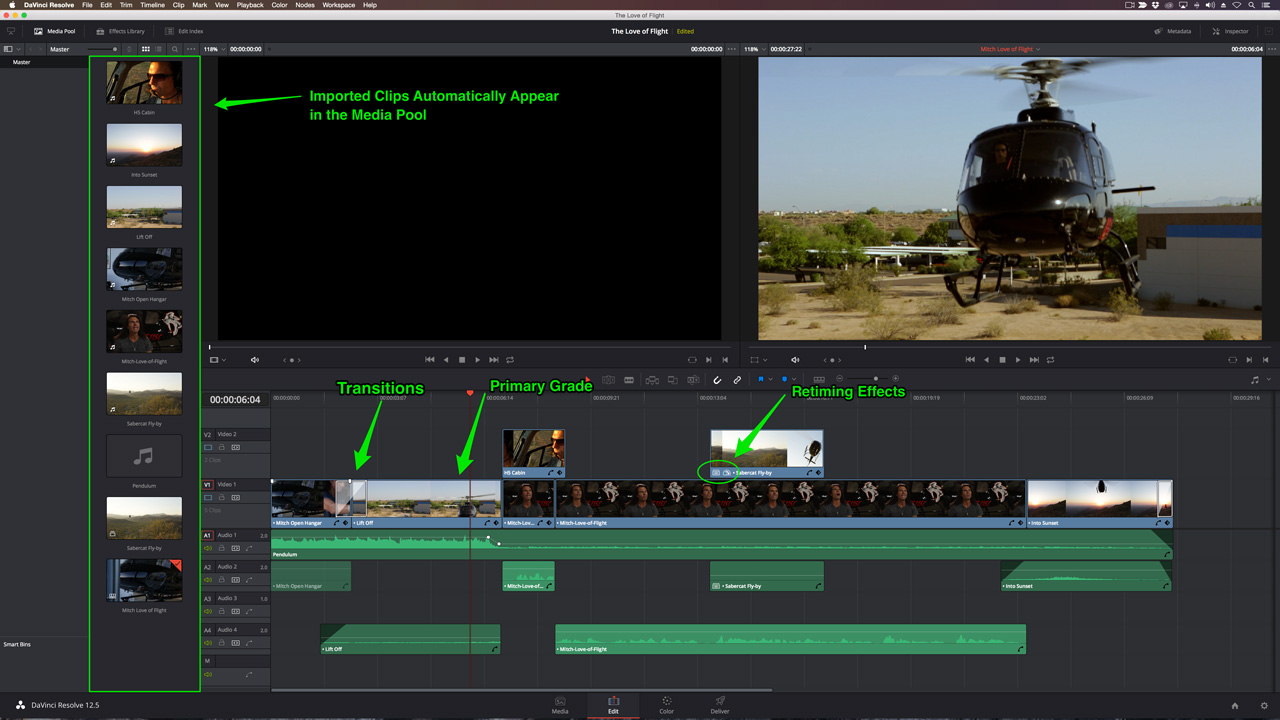
Click Ok and the Project automatically populates with clips in the Media Pool and a Timeline that matches the edit you exported from Final Cut Pro X.
Export the XML out of DaVinci Resolve 12.5
At this point, you can switch over to the Color Page in Resolve and begin grading your clips. Assuming you’ve made all the changes you want to make in Resolve, it’s now time to send the project back to Final Cut Pro X. Switch over to the Deliver Page. In the Render Settings Panel, you will see several Presets along the top. Next to the Final Cut Pro Preset click the arrow and choose Final Cut Pro X.
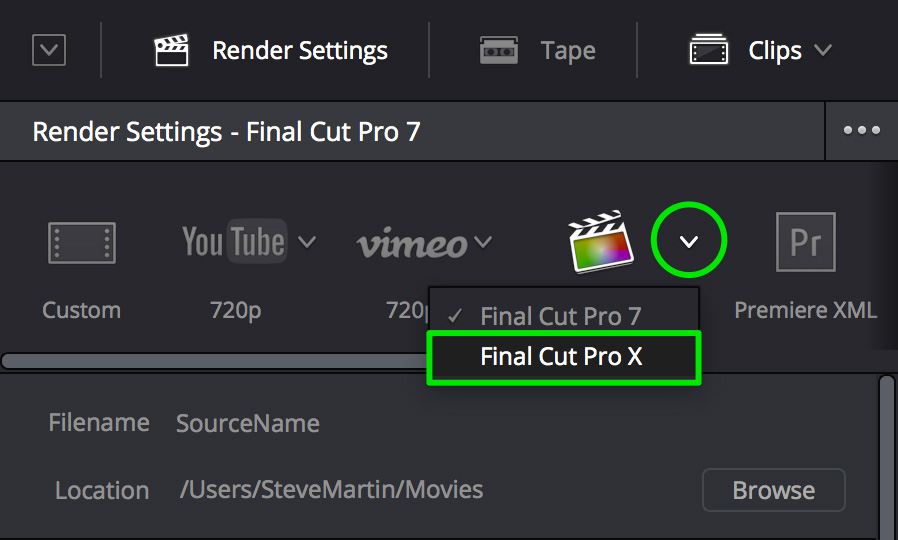
Selecting this option will load the appropriate video format, resolution and audio information specific to Final Cut Pro X projects. At this point, you only have two things to decide; what codec you want your timeline clips rendered into, and where on your hard drive you want these files rendered to.
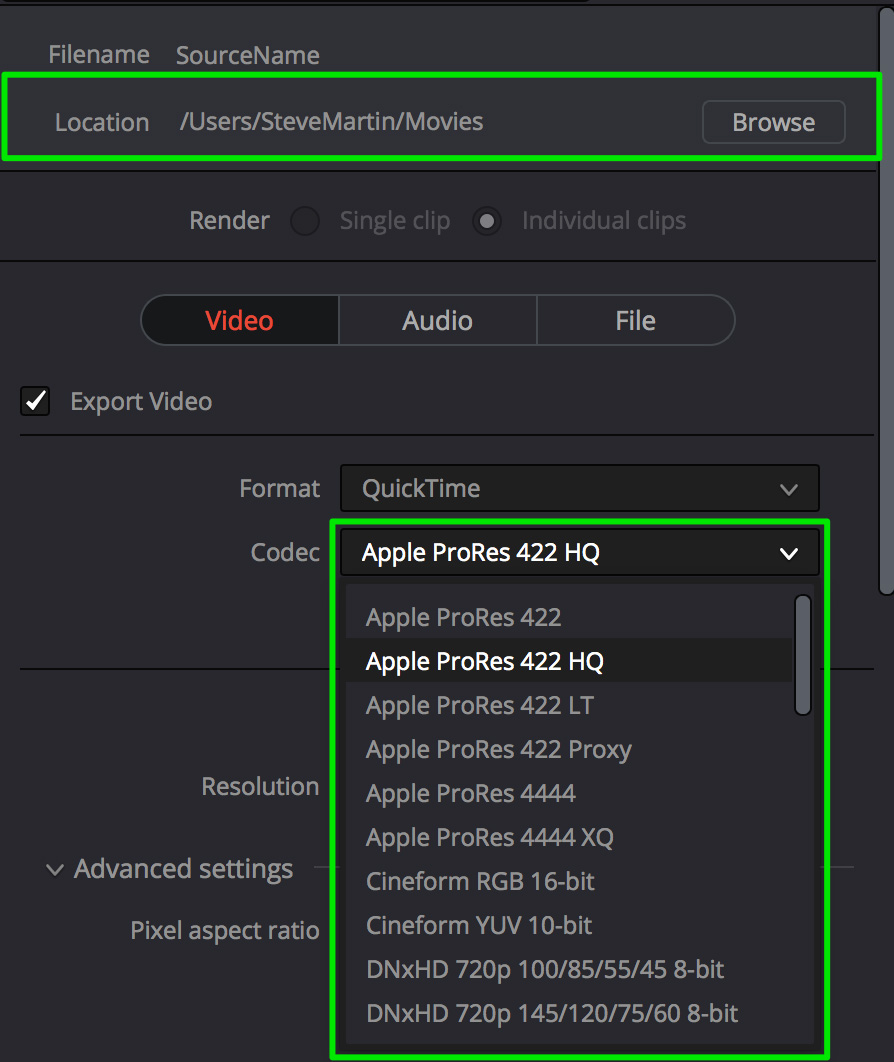
To choose a location for your rendered media, click the Browse button, navigate to the location you want to store your rendered media, click the Add New Folder button, then give the folder a meaningful name. Click OK and OK again to dismiss the File Destination window.
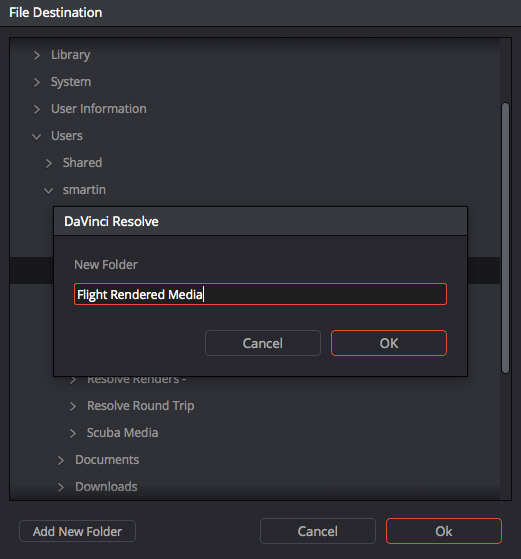
To add all the clips to the Render Queue, choose Entire Timeline in the Render drop down above the Timeline, then Add to Render Queue.

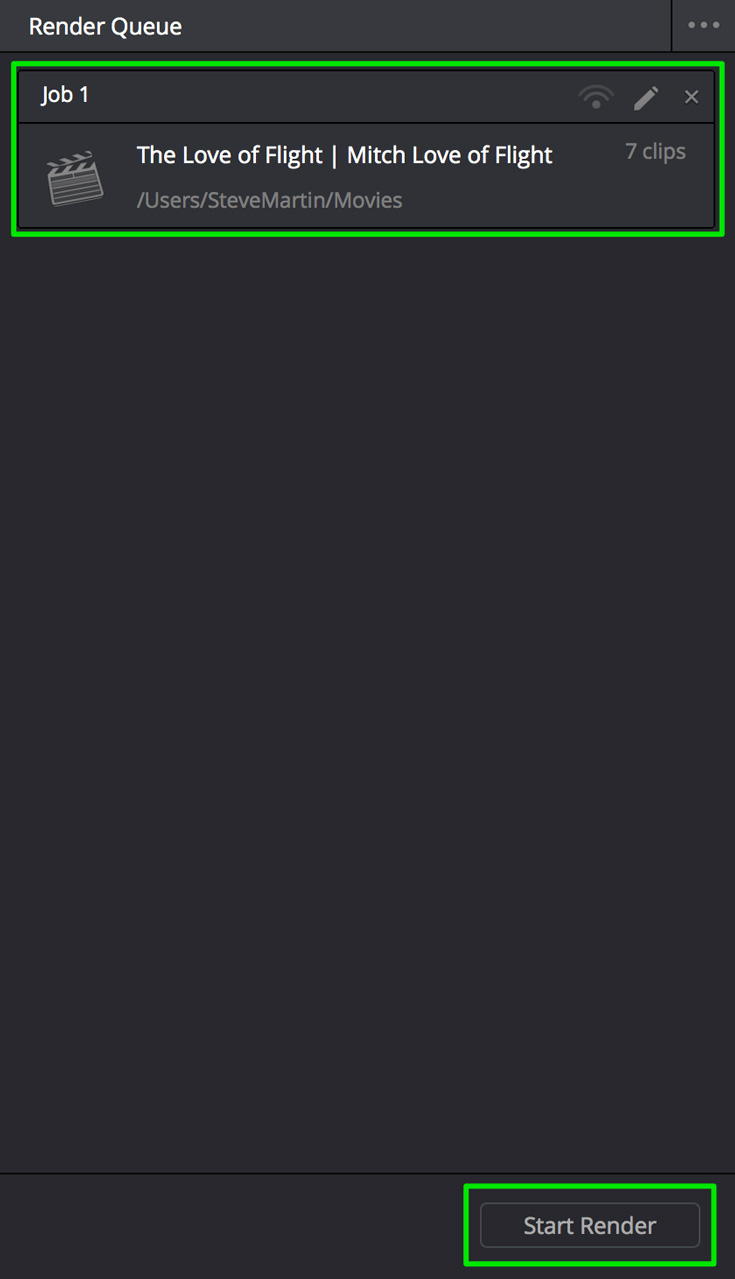
Finally, in the Render Queue, select the Job, then click Start Render.
Import the XML back into Final Cut Pro X
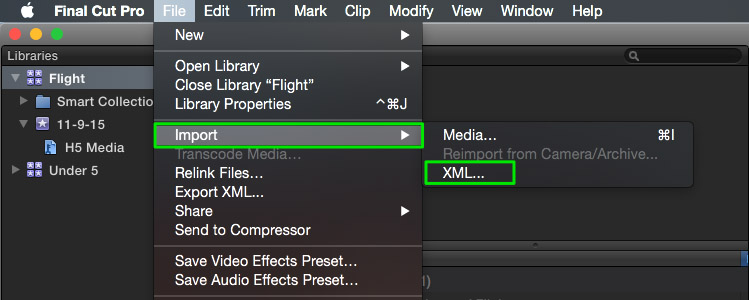
Back in Final Cut Pro X, select the Library you want to import the Resolve project into, then from the File menu choose > Import XML
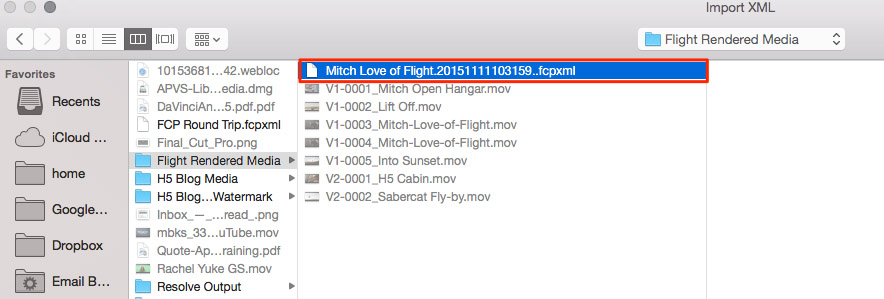
Navigate to the folder you selected for your rendered media. Inside the folder will be an XML file created by Resolve. Select it and click Import.
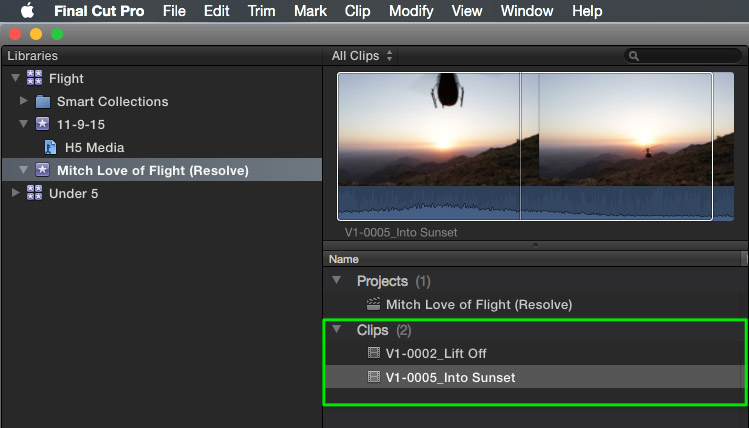
Final Cut Pro X will create a new Event in the Library you targeted and append the name with (Resolve). In the Browser you’ll find the Resolve Project. Notice that no media is imported into the Browser. The assumption is, you are finished editing and all you want to do is output.
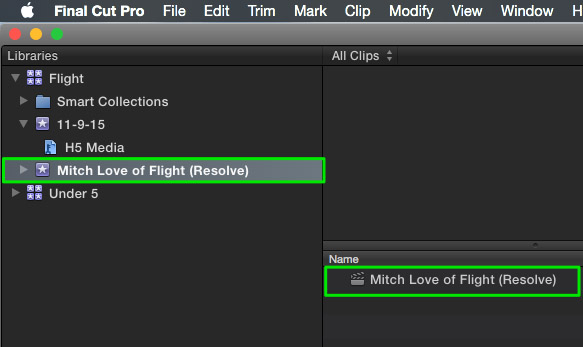
Accessing the media after it has been re-imported into Final Cut Pro X
If you do need access to the rendered media in the Browser, park your playhead over any clip in the Timeline and press Shift-F. I should also point out that this round-trip workflow is a one-way street; meaning, that you can send your Final Cut Pro X grades to Resolve for further manipulation, but you cannot manipulate the grades sent from Resolve to Final Cut Pro X.
The media that constitutes the imported timeline essentially has your color grades baked into the media.




For the love of God, help me. I chop up my footage in FCPX, export the project as XML, import into Resolve as XML, but the timecode is constantly off. I’ve tried changing the timecode to 01:00:00:00 in FCPX (which is apparently what Resolve prefers?) as well as importing the source clips into Resolve beforehand. I have no idea what’s going. Please help.
I have no idea if this helps, but I just read an article on using Drop frame vs. non-drop frame, and how that can mess up communication between programs. You may already be a master of that, but you might consider double checking that they are both interpreting that aspect of the timecode the same way
I have a question. The colorist I want to work with uses PC and I have a Mac. As Resolve is cross platform, Can I still send them an XML and will it still work as prescribed? Also, do they have to have the original media files or only the XML?
Hi Winter. The PC/Mac thing shouldn’t matter at all. Your colourist will need the original media. The XML is effectively only a list of cut marks, so Resolve (or any other software) can rebuild the project itself with the original media.
I noticed that when I bring the XML back to FCPX it adds the original correction on top of the corrections from DaVinci resulting in double correction and I have to manually remove it from the imported clips. Is that normal?