Are you looking for updated movies for the lastest version of Final Cut Pro X?
Click here to see FCP 10.4
Final Cut Pro 10.3 Free Trial Tutorial
Adding Effects in Final Cut Pro X
In the previous lesson you learned how to add transitions and a lower third title to your project. In this video you’ll learn how to add effects, and enhance the look of your movie. Start by parking the playhead over the Sabercat Flyby clip in the timeline. Let’s add some flare to this shot by adding an effect to it. On the far right side of the toolbar open the Effects Browser. You can preview any effect in the viewer by skimming over the thumbnails.
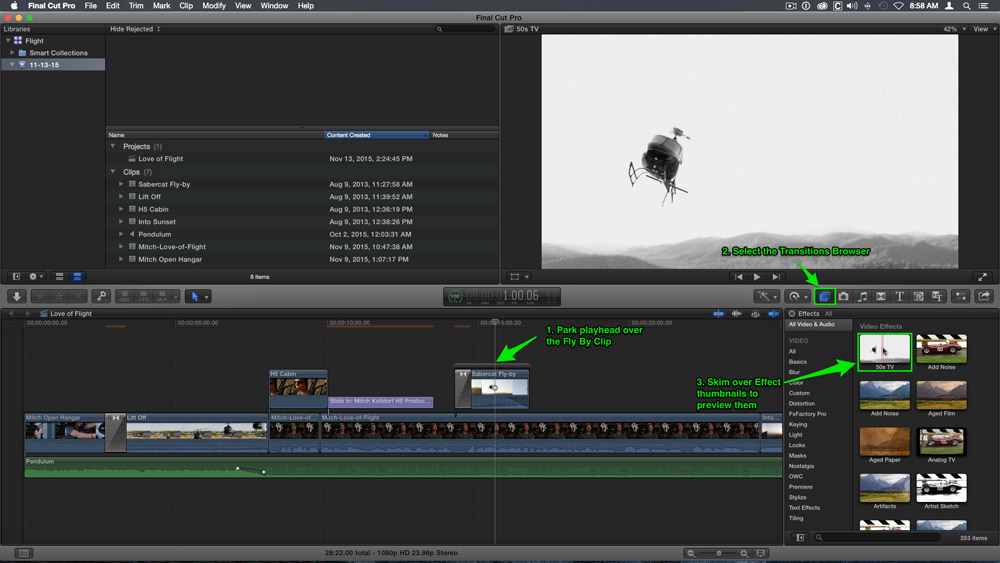
Adding the Artifacts Effect
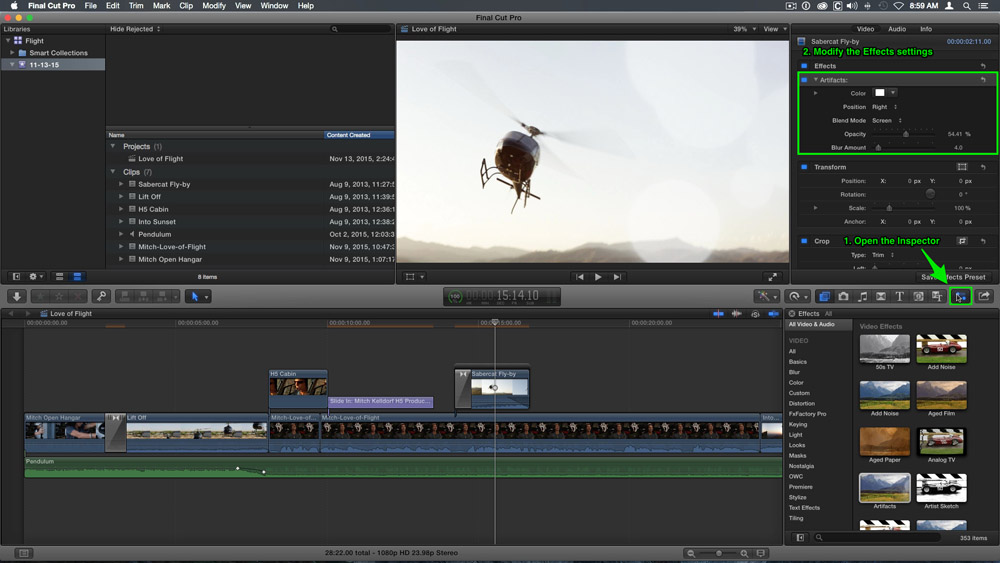
Skim over the Artifacts Effect. This one looks pretty good. To apply this effect, drag it over the Sabercat Fly By clip in the timeline. When you see the plus sign appear, release your mouse. Now open the inspector by clicking the inspector button on the far right of the toolbar.
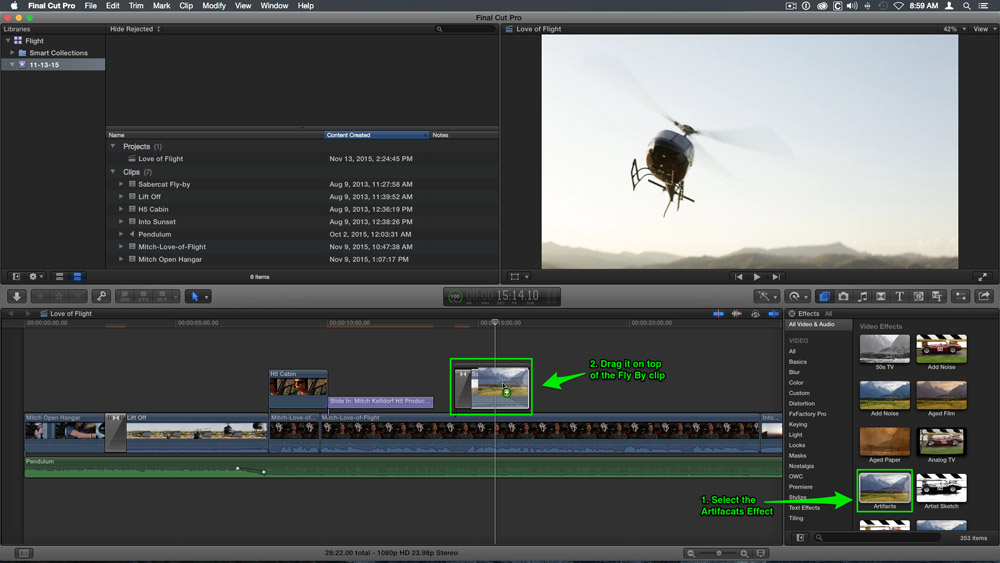
Modifying the Effect
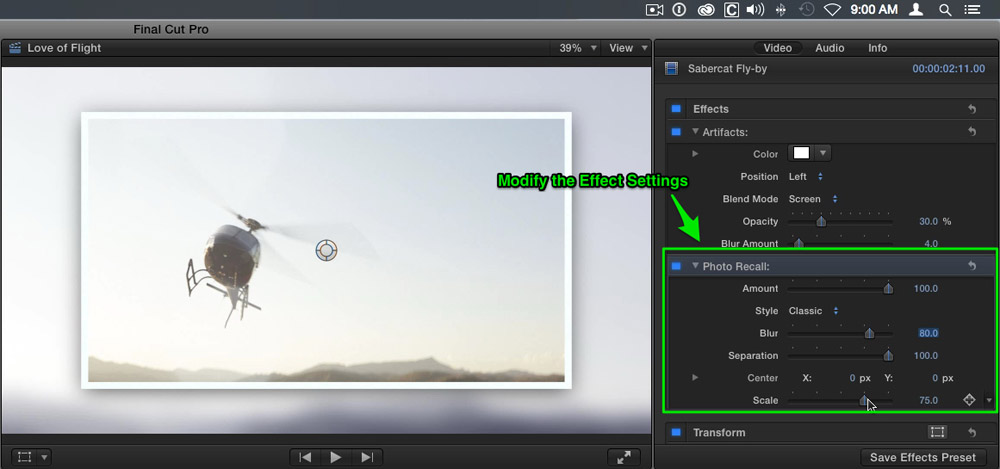
Under the effects section you can see the Artifacts effect is applied and there are also settings for customizing the effect. Let’s change the Position to Left, and the opacity to 30%.
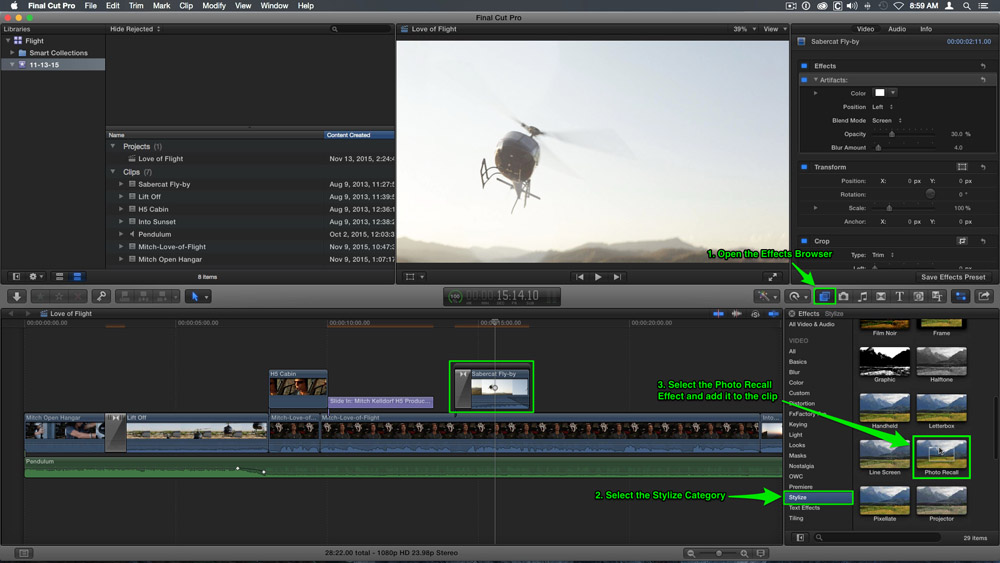
Adding the Photo Recall Effect
To make this clip seem more like a memory or flashback we can add another effect to the clip, let’s go to the the stylize category in the effects browser, and scroll down until you see the Photo Recall effect. Skim the thumbnail to preview it, then add it to the clip.
Modifying the Effect
In the inspector, change the blur to 80, the Separation to 100, and the scale to 75. Move your playhead back to the beginning of the Fly by clip and play it back…
Copying Effects from Clip to Clip
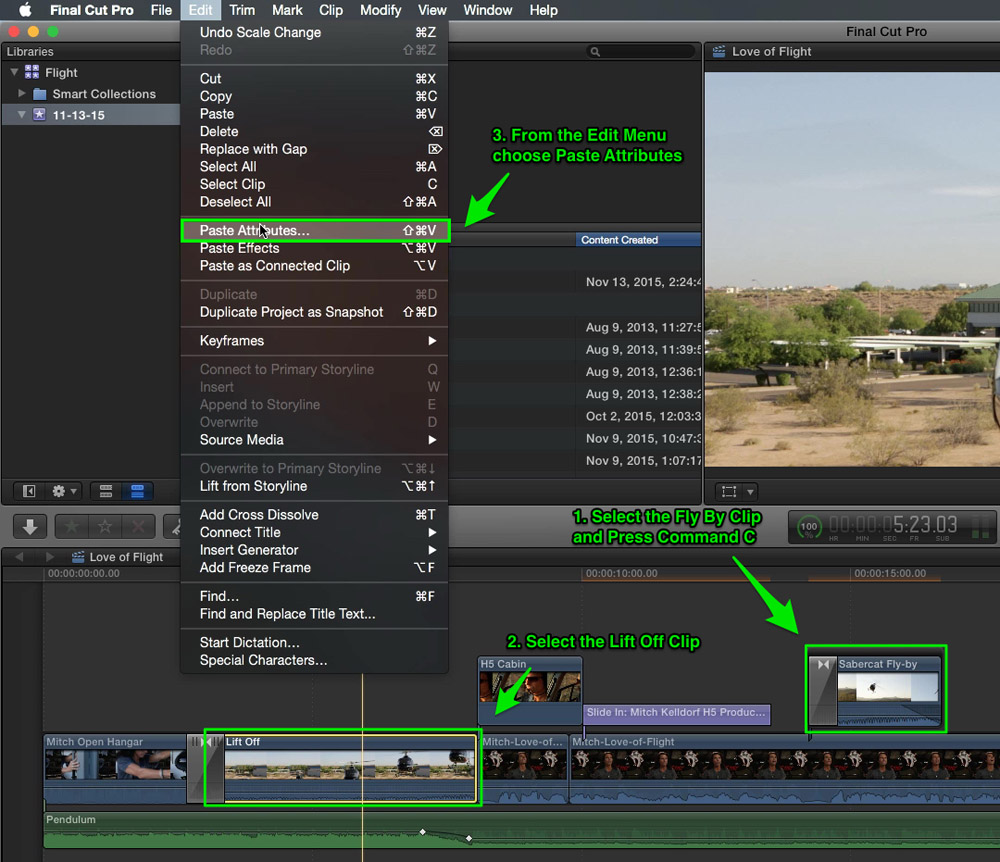
Let’s skim to the Lift Off clip and click once in the gray area to park the playhead over it. Rather than re-applying the same effects to this clip,you can copy effects from one clip to another. Select the Sabercat Fly by clip and press Command-C to copy, then select the Lift Off clip and from the edit menu choose Paste Attributes.
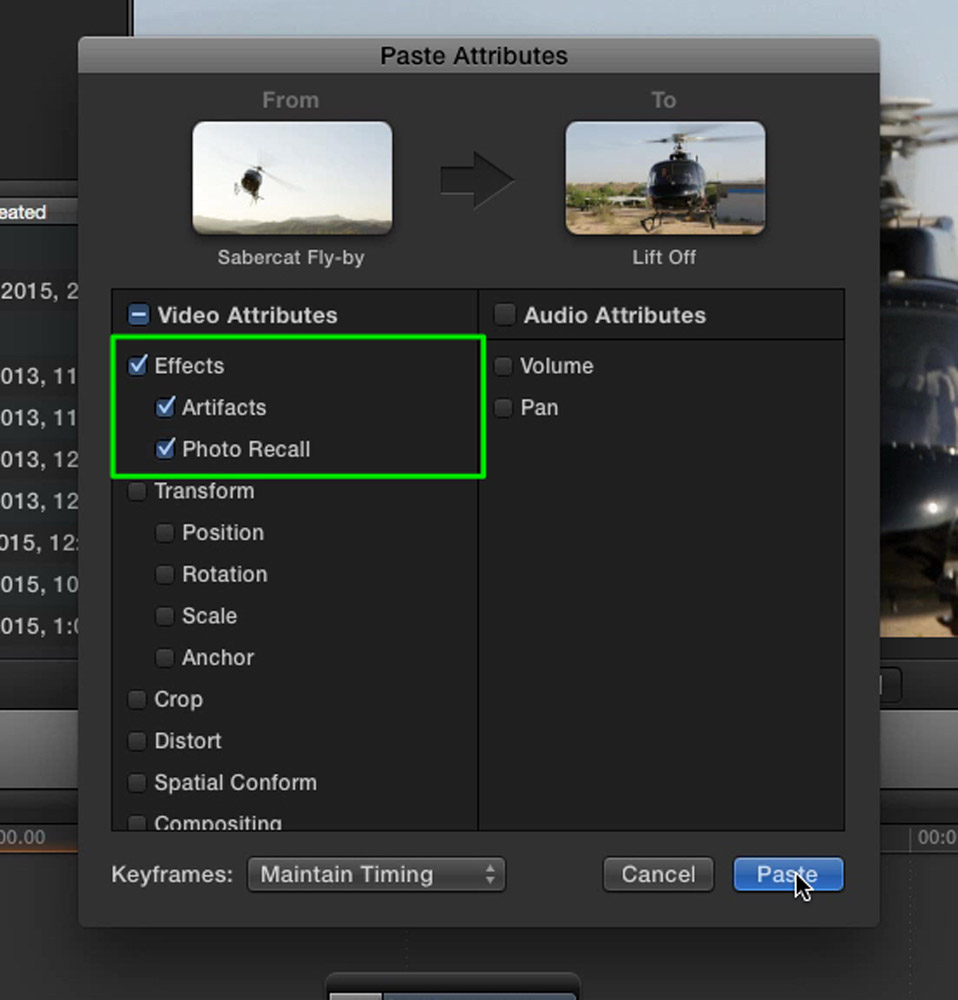
The Paste Attributes window appears and at the top of the window you can see that we’re about to paste from the Sabercat Fly clip by to the Lift Off clip. Also notice, there are two columns, one for Video Effects and one for Audio Effects. Check the boxes next to Artifacts and Photo Recall, then press Paste. Play back the Lift Off clip.
Color Balancing a Shot
Now, let looks at how to quickly color balance a clip. Skim over the H5 Cabin clip. This clip was shot late in the day and Mitch appears a bit too orange. To neutralize the color cast, go to the Enhancements Menu and choose Balance Color.
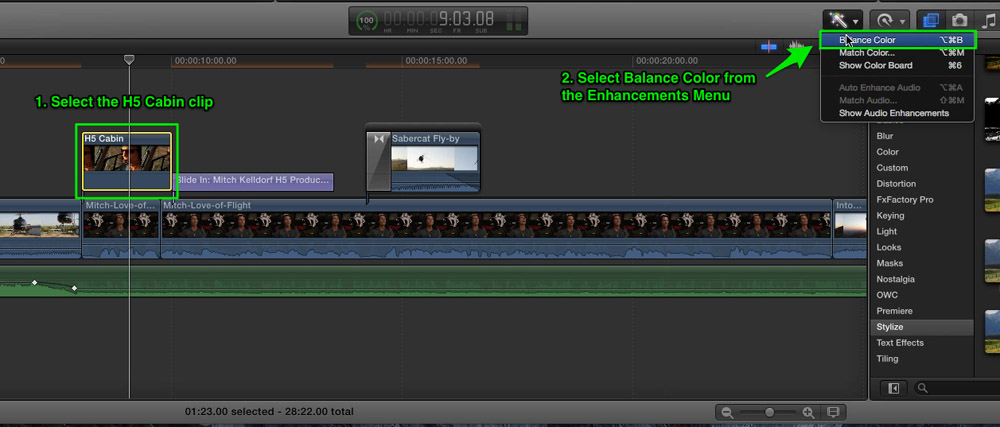
Final Cut Pro X will automatically balance the color and eliminate most of the orange cast from the shot. In the inspector under Effects click the blue box next to Balance Color to see a before and after of the shot. In the final lesson, we’ll look at how to share your movie.
This is Lesson 7 of our free Final Cut Pro X tutorial. If you are enjoying this tutorial, show us your appreciation by sharing!
- Lesson 1: Getting Started with the Final Cut Pro X Free Trial
- Lesson 2: Importing Media into Final Cut Pro X
- Lesson 3: Adding Clips in Final Cut Pro X
- Lesson 4: Trimming in Final Cut Pro X
- Lesson 5: Working with Sound in Final Cut Pro X
- Lesson 6: Adding Titles & Transitions in Final Cut Pro X
- Lesson 7: Adding Effects in Final Cut Pro X
- Lesson 8: Sharing your Movie in Final Cut Pro X


