How to use Ripple Tools Complete 2.0
Step 1: Apply
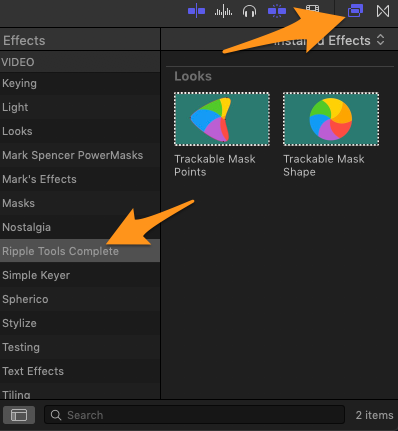
Once installed with the FxFactory application, Ripple Tools Complete will appear in the Titles Browser and the Effects Browser in Final Cut Pro X. There are 35 titles templates organized into 6 themes and 2 effect templates. Templates with a checkerboard outline around them are trackable.
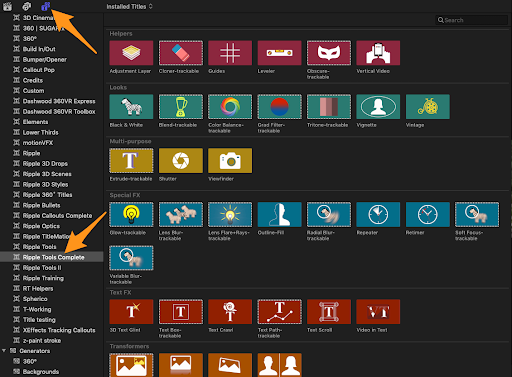
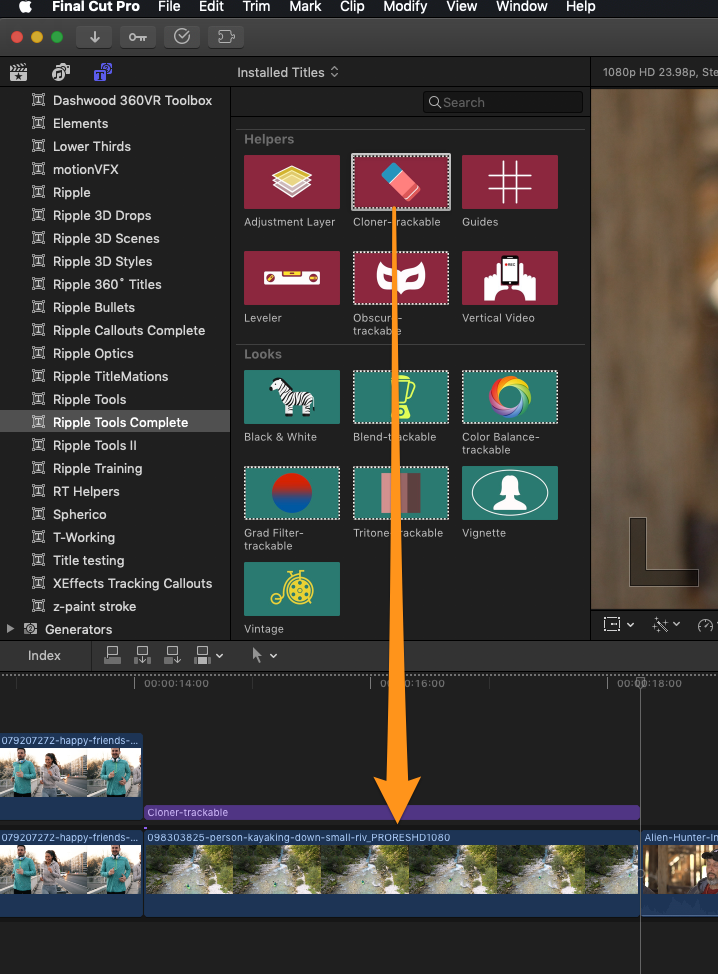
To add a Ripple Tools Complete title template to your project, either drag it over a clip or first select the clip range by pressing the X key (when the playhead is over the clip) and then press the Q key to perform a connect edit matching the selected range.
To add a Ripple Tools Complete effect, first duplicate your timeline clip on top of itself (Option-drag up or C to select, Command-C to copy, move the playhead to the start, Option-V to paste as connected clip), then drag the effect to the top clip. See the movie below for more information on using these effects.

Step 2: Modify
If the template is trackable and you want to track an object, first disable the effect, then run the tracker. Below is a video explaining how to track.
If text is involved, it can be edited in the Viewer and styled in the Text Inspector. All parameters for each template are available in the Title Inspector. Most can be animated with keyframes.
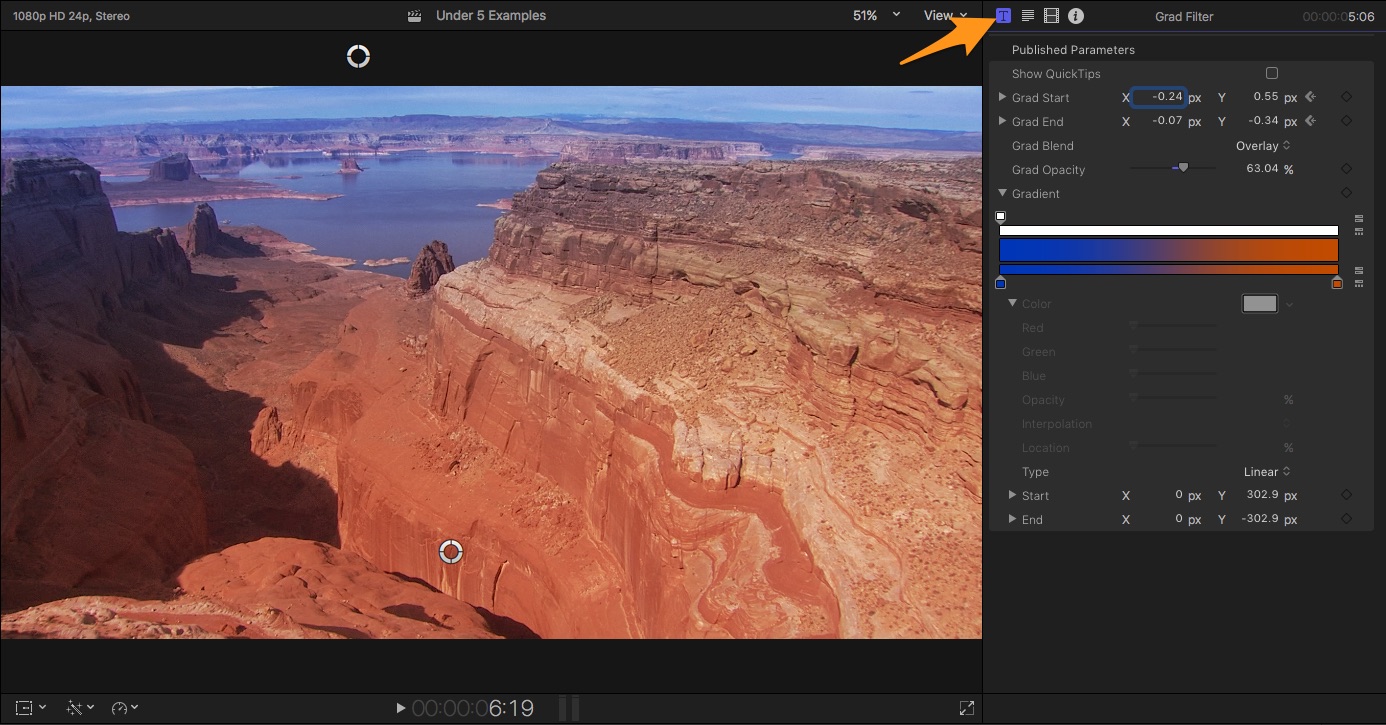
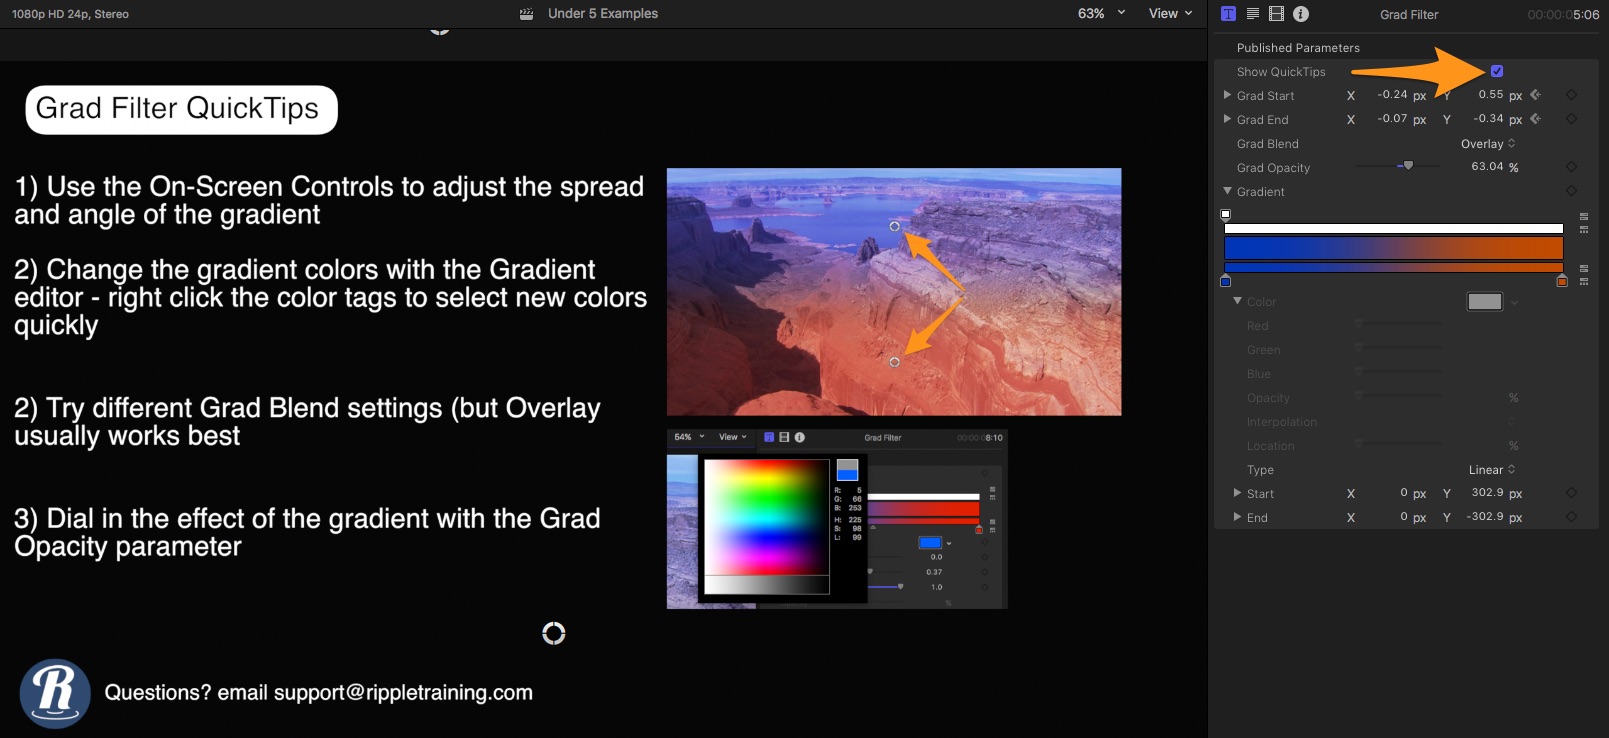
For tips on how to use each template, click the Show QuickTips checkbox:
Helpful Videos for Ripple Tools Complete 2
Tracking
Working with Looks
Working with Tracked FCP X Color Corrections
We hope you enjoy Ripple Tools Complete 2. If you have questions or feedback, please contact us at [email protected]. If you like Ripple Tools Complete, be sure to check out our other plugins for Final Cut Pro X, including Ripple Callouts Complete – they are all distributed through FxFactory, and trial versions of each can be found in your Titles, Transitions, and Effects Browsers.
