Are you looking for updated movies for the lastest version of Final Cut Pro X?
Click here to see FCP 10.4
Final Cut Pro 10.3 Free Trial Tutorial
Adding a Lower Third
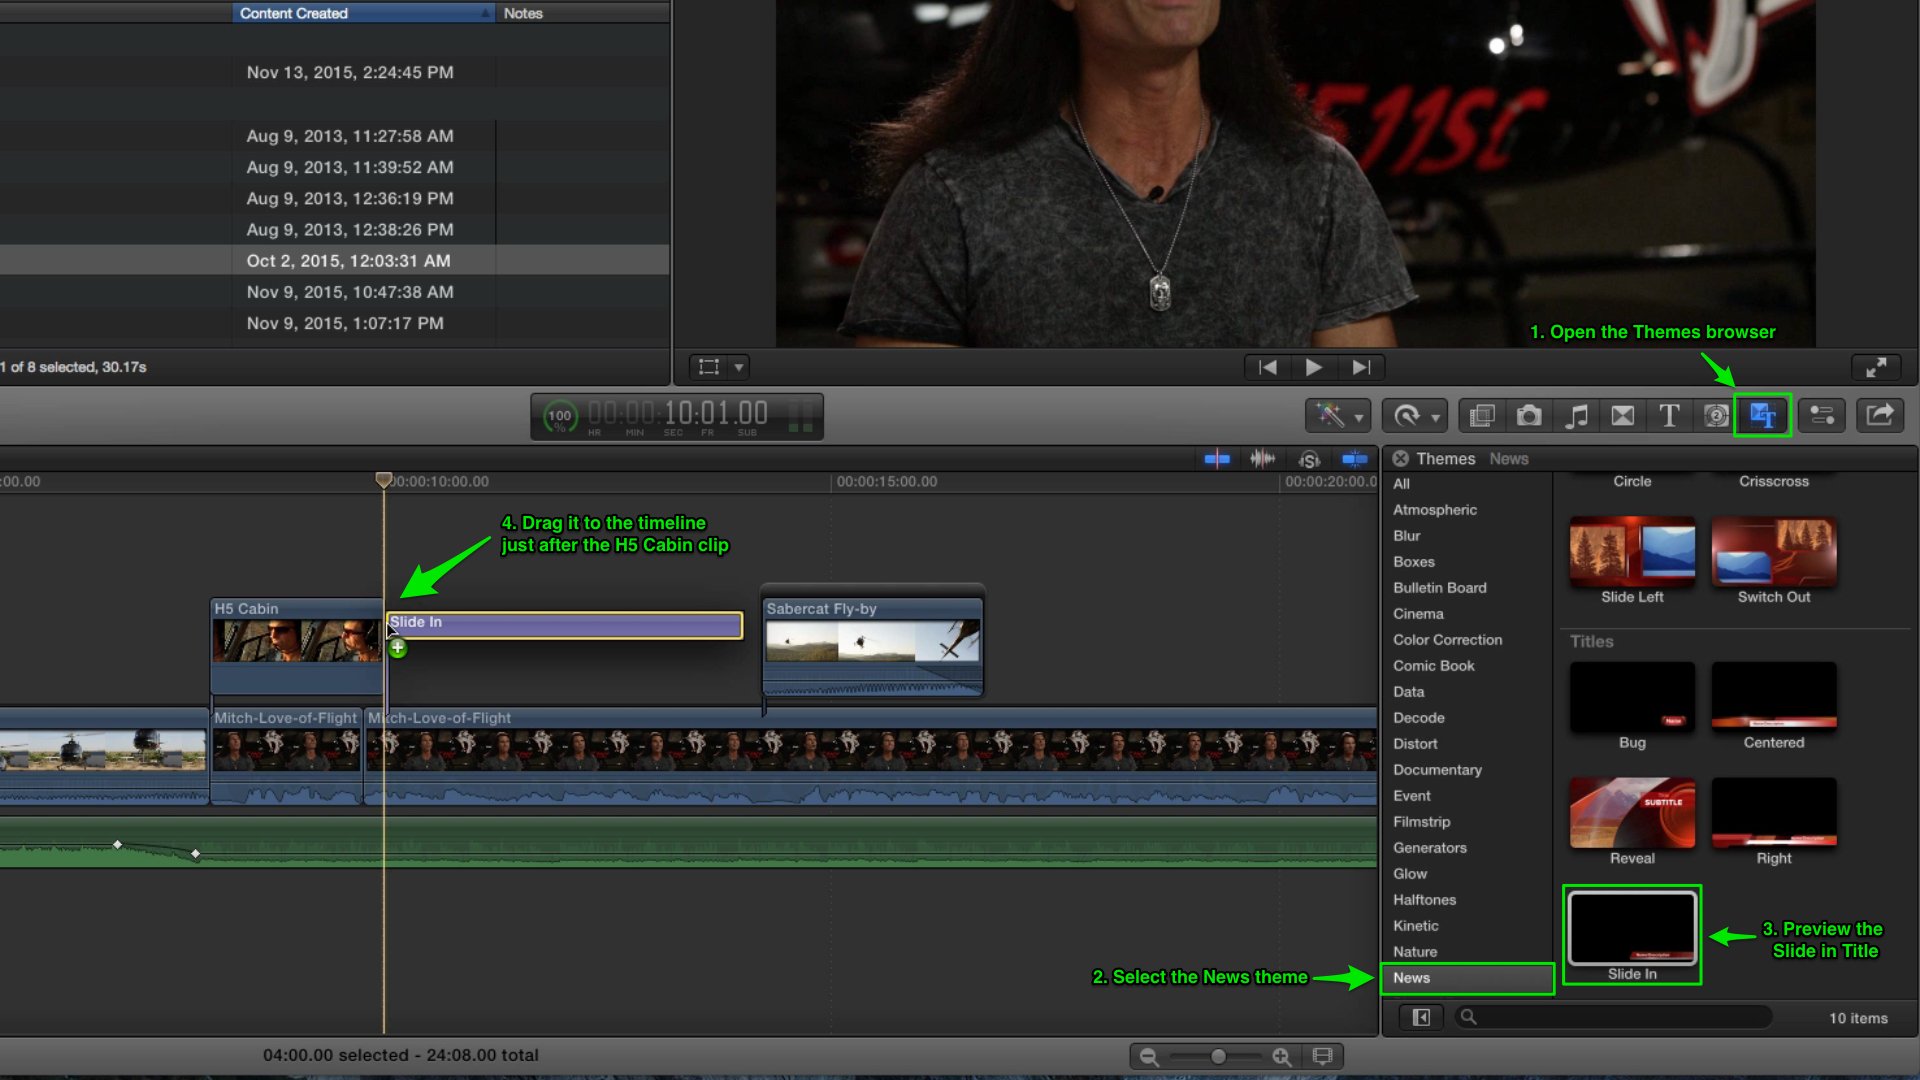
Move your playhead to where we first see Mitch in the interview (right after the “Lift Off” clip). Now open the Themes Browser and select the News category then scroll down to the Slide In title. You can preview the title by skimming over it in the browser. Drag the title above the “Mitch” clip until the left edge snaps to the playhead.
Editing the Title
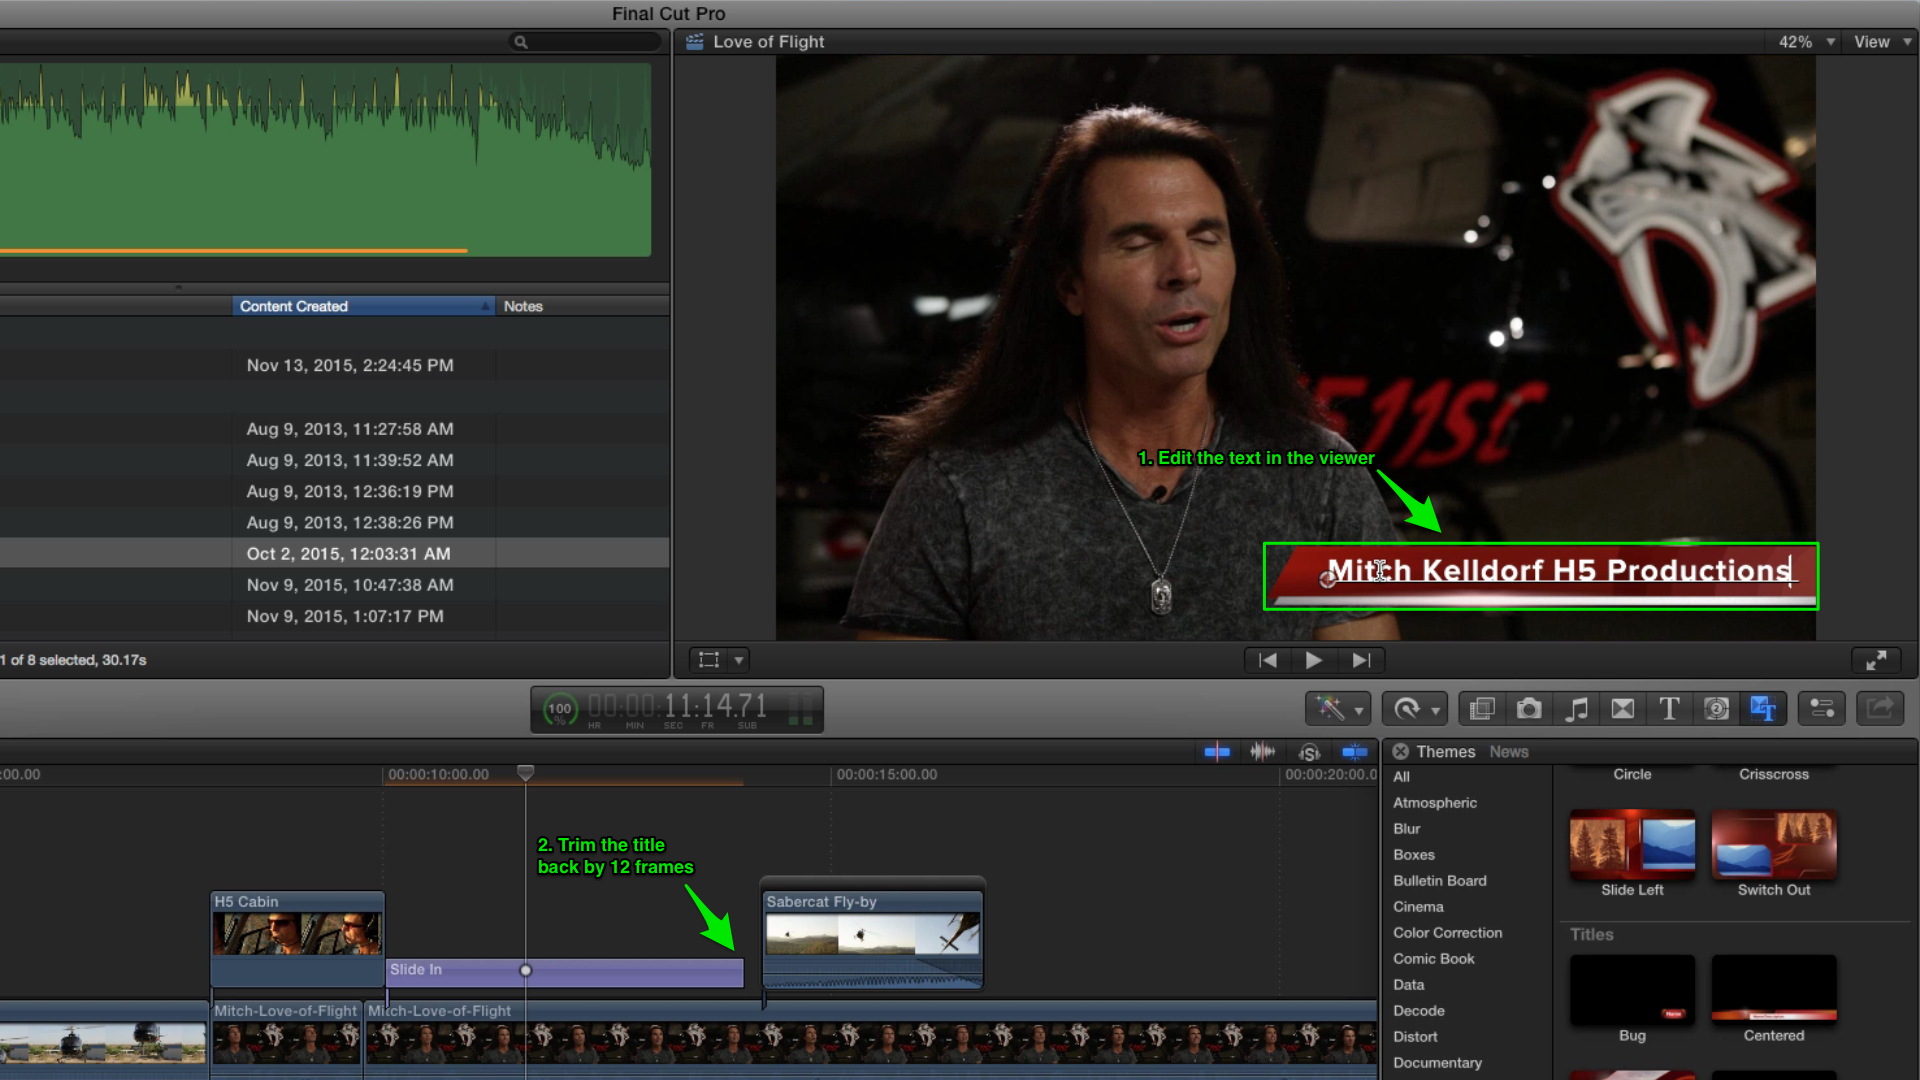
Now move the playhead over the title and double-click the name in the Viewer and type in Mitch Kelldorf – H5 Productions, Then, trim the tail of the title back 12 frames and play it back.
Adding Transitions
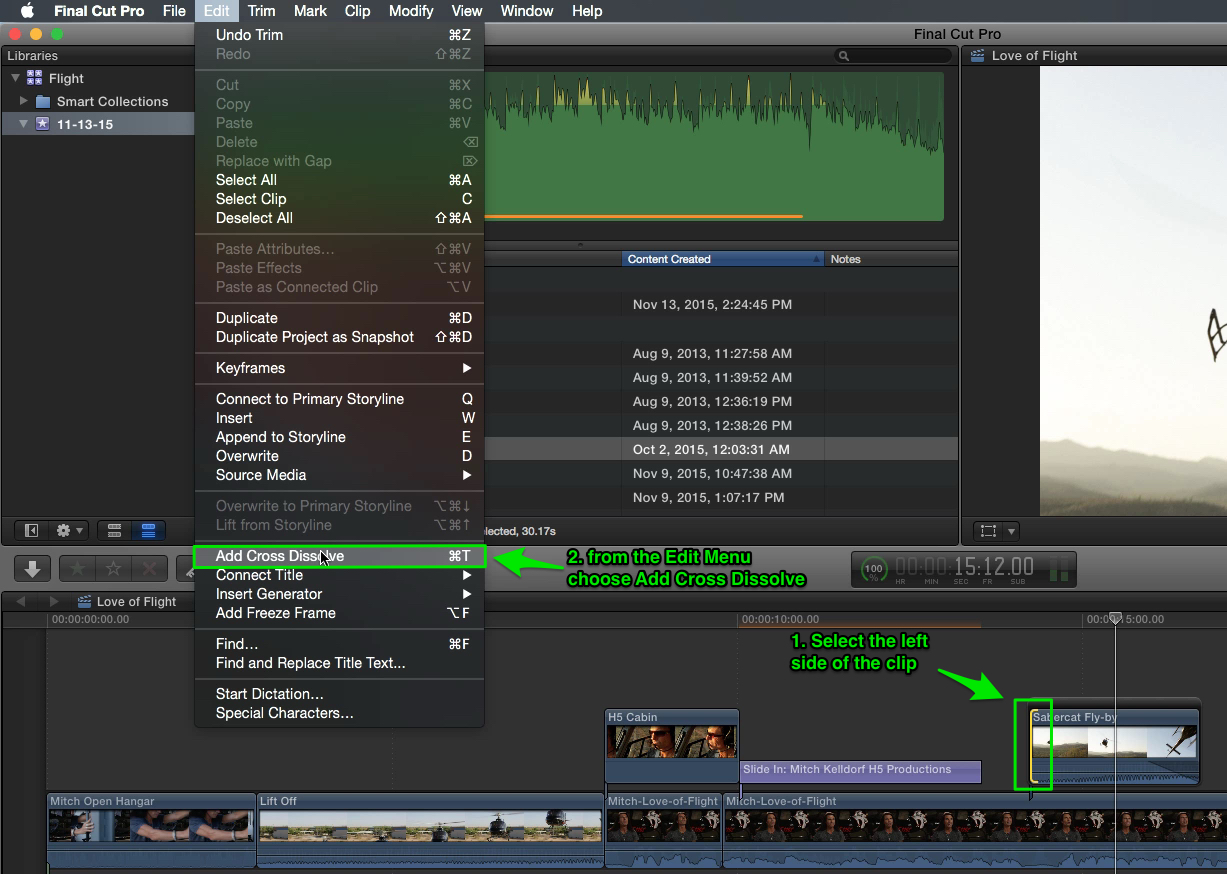
Excellent. Now it’s time to add a transition. Select the left edge of the Sabercat Fly-by connected clip. From the Edit menu, select Add Cross Dissolve, then trim the dissolve until it’s 12 frames long. Let’s see how that looks.
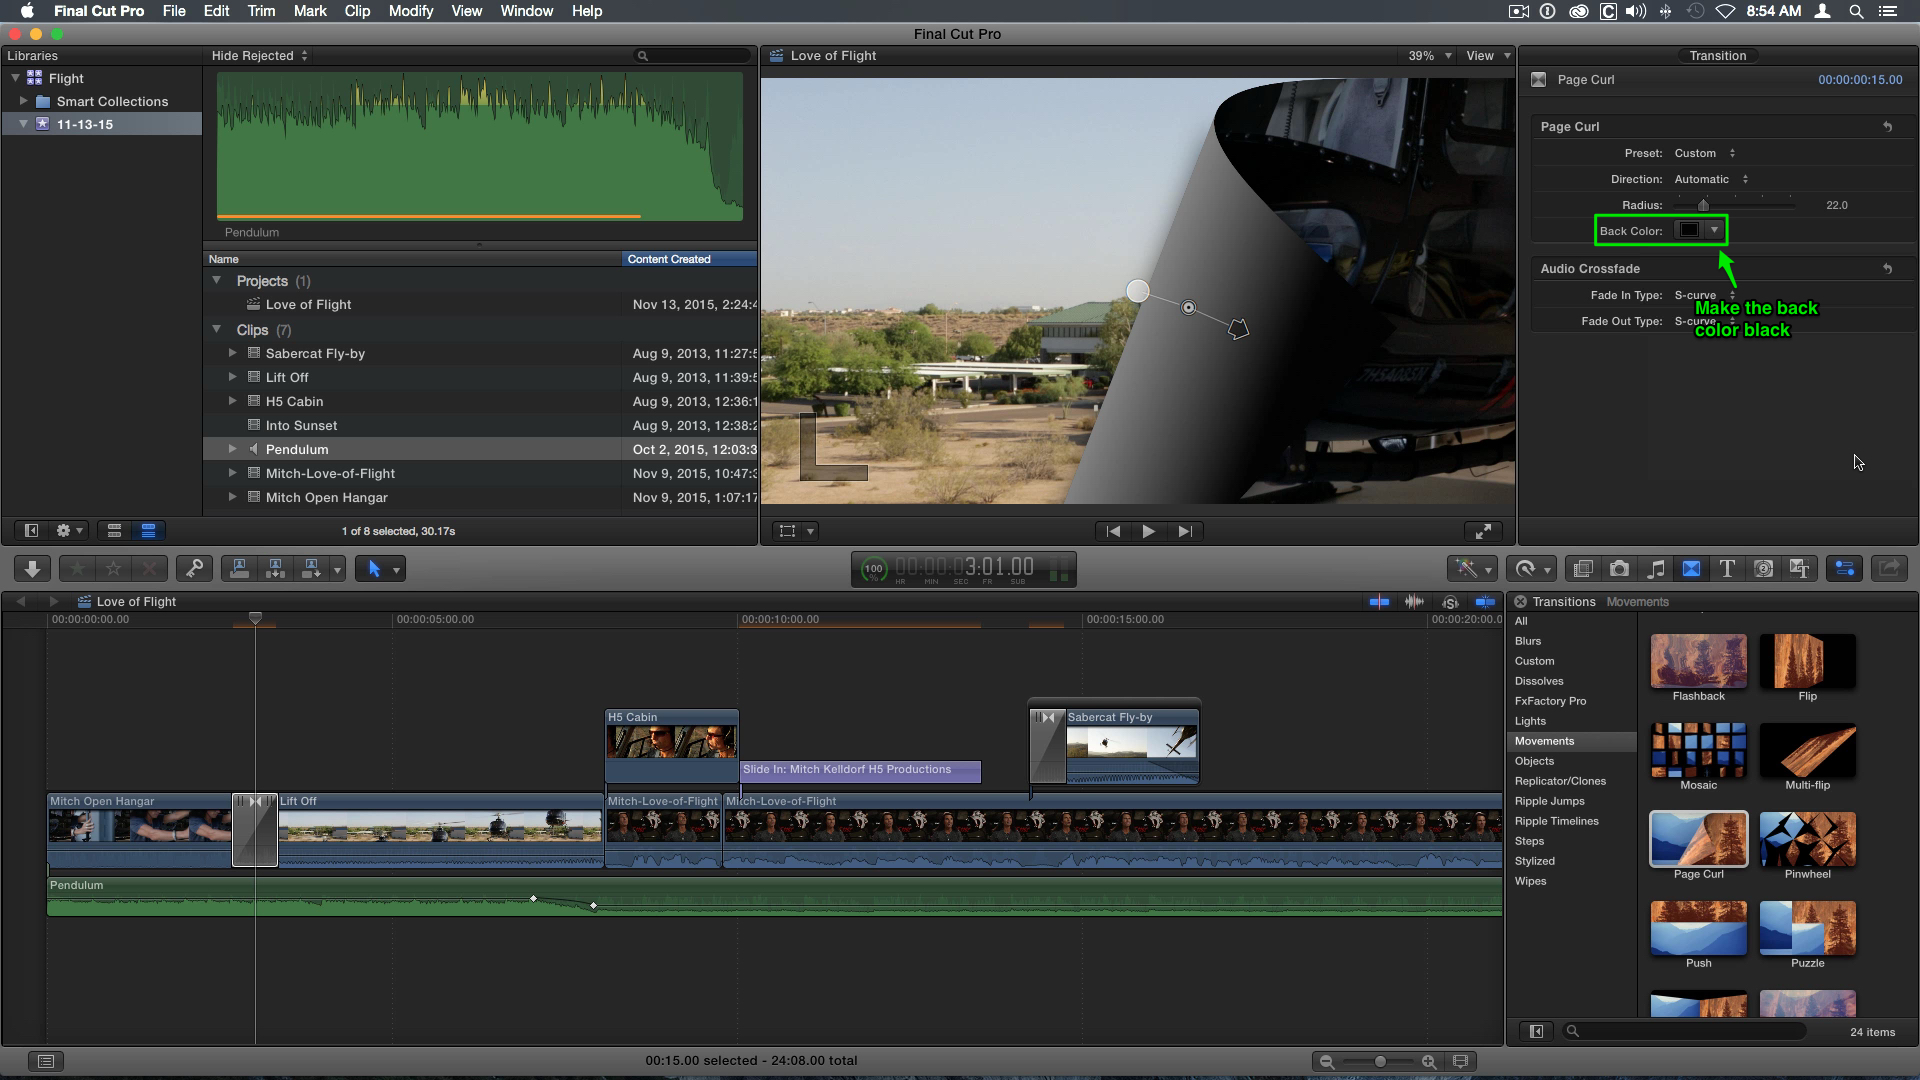
Okay, now for another one. Go into the Transitions Browser and open the Movements category, then drag the Page Curl transition onto the first edit point between Mitch Opens the Hangar and Lift Off.

Modifying Transitions
Now Option-Click to select the transition and park your playhead over it. In the Viewer you now have a set of control handles that will allow you to change the direction of the page curl to whatever you’d like. If you open the Inspector you can change the radius of the page curl and the backing color. A black backing will look best here, so go ahead and choose that for now.
Adding the Last Shot
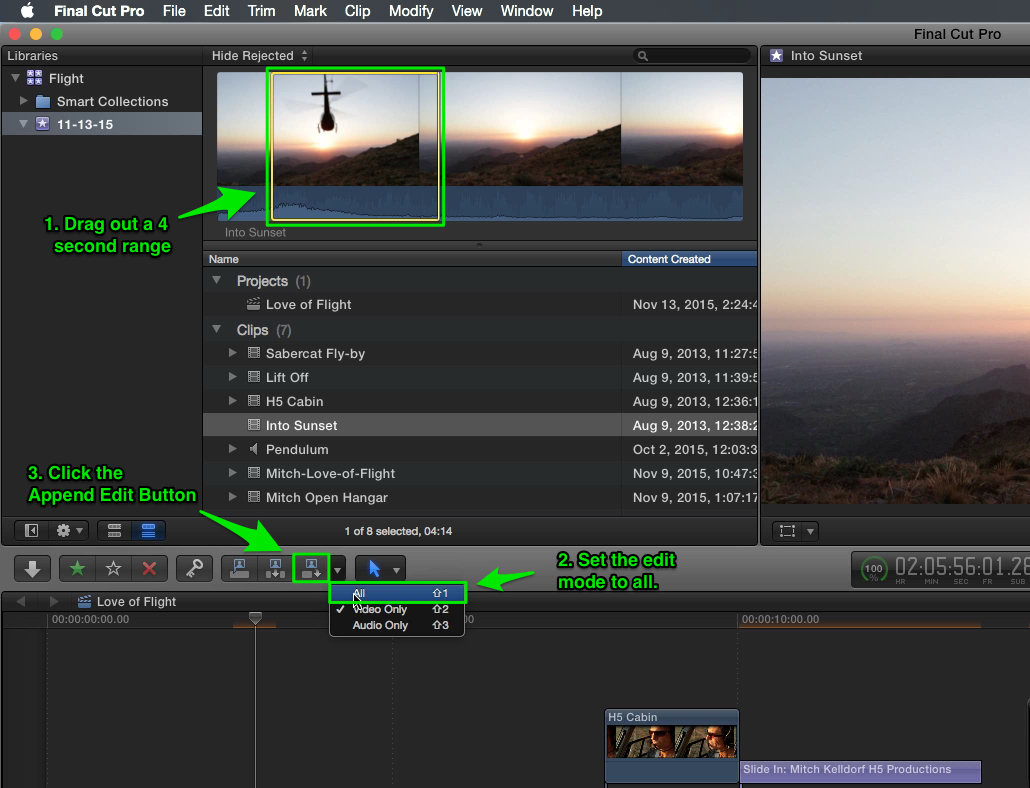
Now that you’ve had a chance to familiarize yourself with the controls in the Viewer and the Inspector, we’ll add one more clip and and fade it out. In the browser locate the clip titled Into Sunset. Drag out a range from just before we see the helicopter enter frame and drag it to about 4 and a half seconds. The tooltip will show your selection length. With the clip selected, make sure you have the edit mode set to All, then click on the Append Edit Button to add the clip to the end of the storyline.
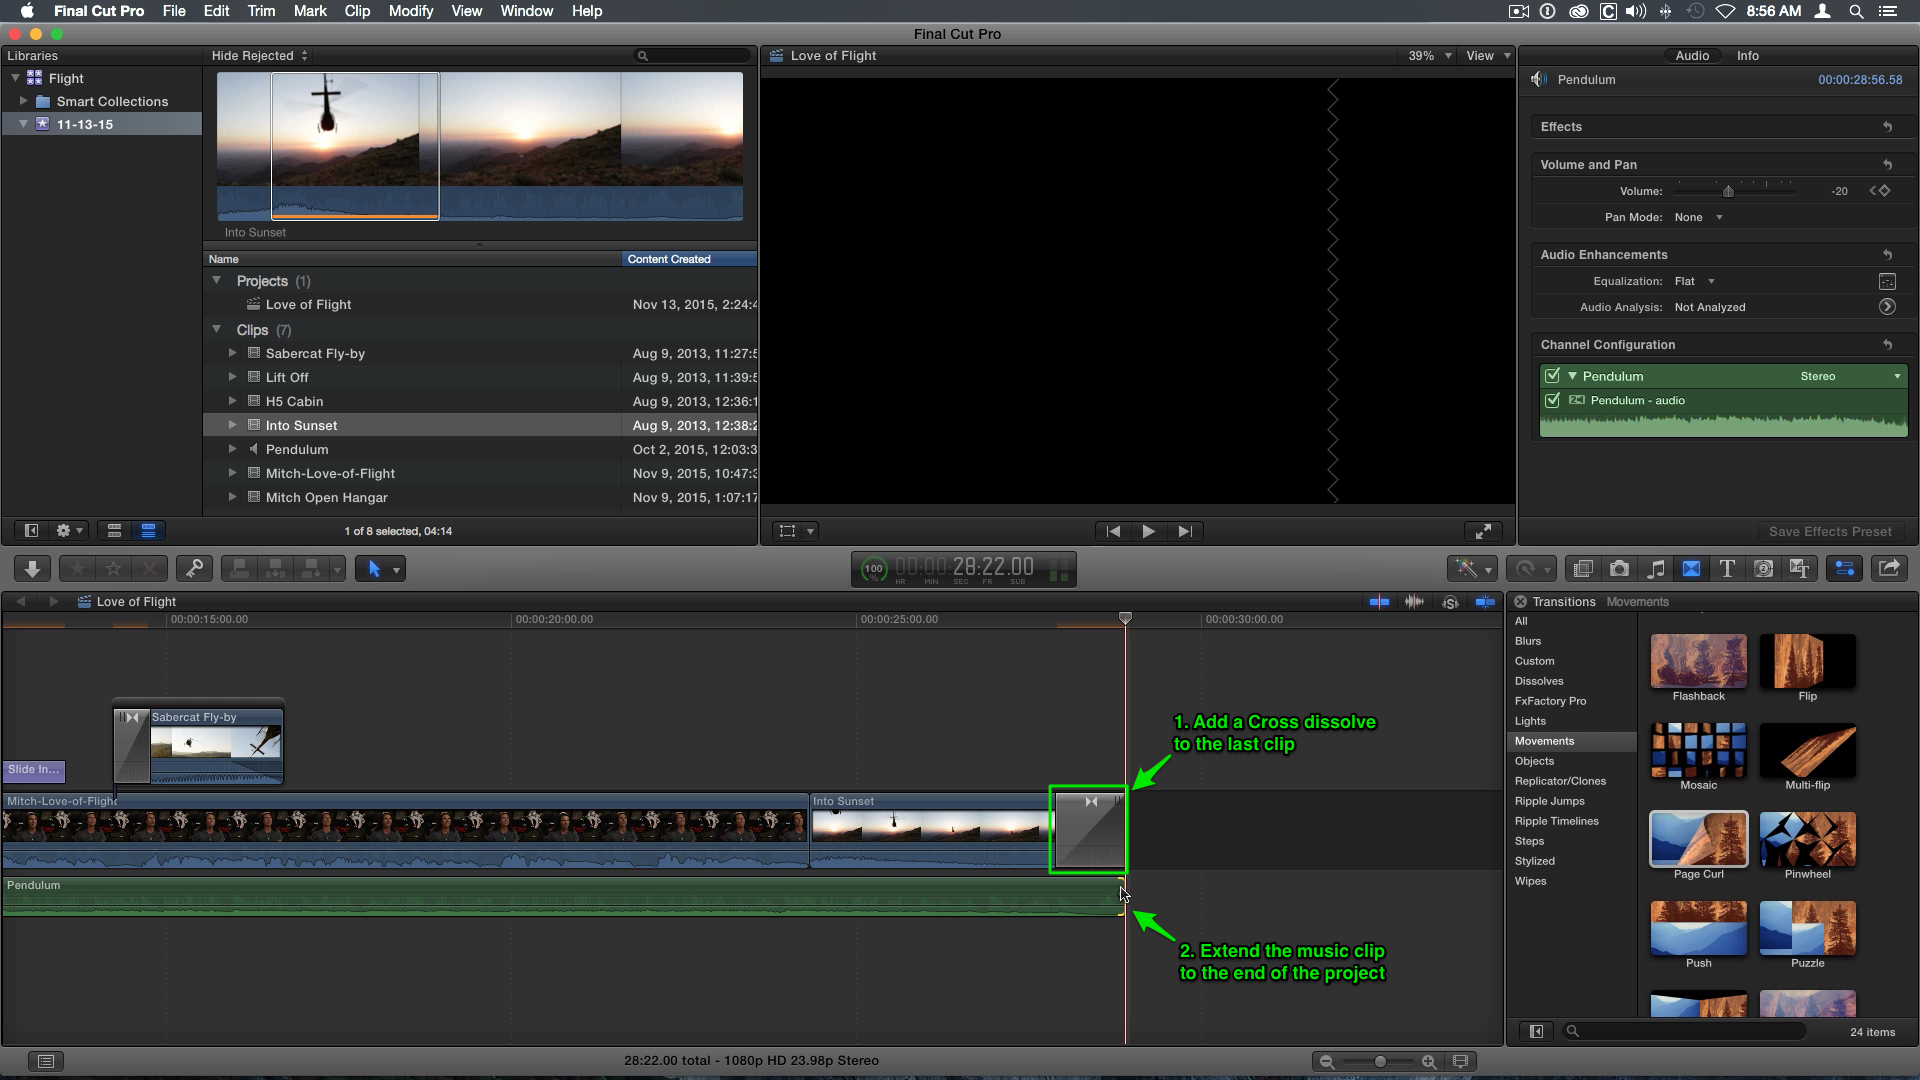
Now select the tail of the clip we just added, and press Command-T to add a transition to the end. A Cross Dissolve is the default transition in Final Cut Pro X.
Extending the Music
Now drag out the music to match the end of the clip, and play it back…
Awesome job. In the next video we’ll start adding effects to our video clips that will alter the general feel of the project.
This is Lesson 6 of our free Final Cut Pro X tutorial. If you are enjoying this tutorial, show us your appreciation by sharing!
- Lesson 1: Getting Started with the Final Cut Pro X Free Trial
- Lesson 2: Importing Media into Final Cut Pro X
- Lesson 3: Adding Clips in Final Cut Pro X
- Lesson 4: Trimming in Final Cut Pro X
- Lesson 5: Working with Sound in Final Cut Pro X
- Lesson 6: Adding Titles & Transitions in Final Cut Pro X
- Lesson 7: Adding Effects in Final Cut Pro X
- Lesson 8: Sharing your Movie in Final Cut Pro X

