Are you looking for updated movies for the lastest version of Final Cut Pro X?
Click here to see FCP 10.4
Final Cut Pro 10.3 Free Trial Tutorial
Trimming in Final Cut Pro X
In the last video you learned how to tag selection ranges as favorites and edit clips into the timeline. In this lesson, we’re going to take a look at trimming clips in your timeline to improve the story pacing. We often think of trimming as removing something, like “trimming a hedge”, but in editing, the term can also refer to adding something, like trimming a Christmas tree by adding ornaments.
Dragging to Lengthen a Clip
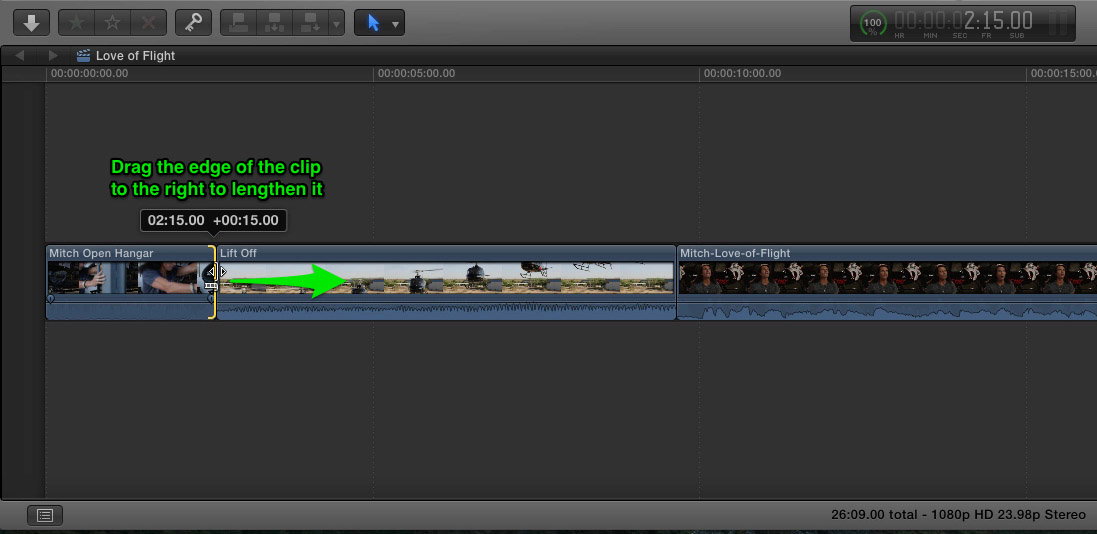
In the same sense we are going to shorten and/or lengthen our clips in the timeline as the story dictates. For example, skimming over the Mitch Open Hangar clip, it would be better if we saw the nose of the aircraft after Mitch slides opens the door. Click to select the right side of the clip – called the tail of the clip – then drag to the right while watching the Viewer. In this instance we are adding frames to the clip making it longer. Drag until you see the nose of the helicopter revealed in the viewer, then release the mouse.
Dragging to Shorten a Clip
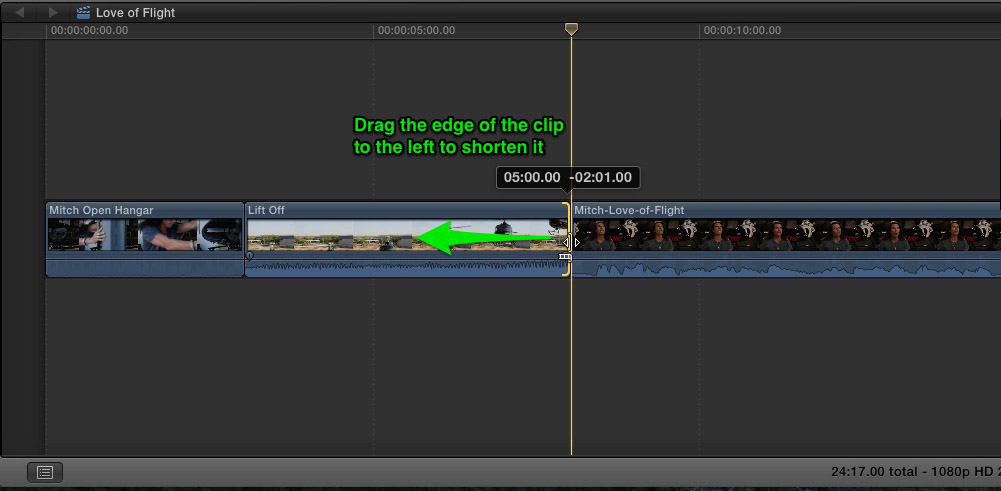
Let’s move to the next clip. If we skim over the Lift Off clip it’s a bit too long; we don’t need to see the helicopter leave the frame completely for this shot. Drag the playhead while watching the center window in the Toolbar called the Dashboard. The numbers indicate the current time value at the current playhead location. Drag the playhead until the dashboard reads roughly 8 seconds.
Using the Trim End Command
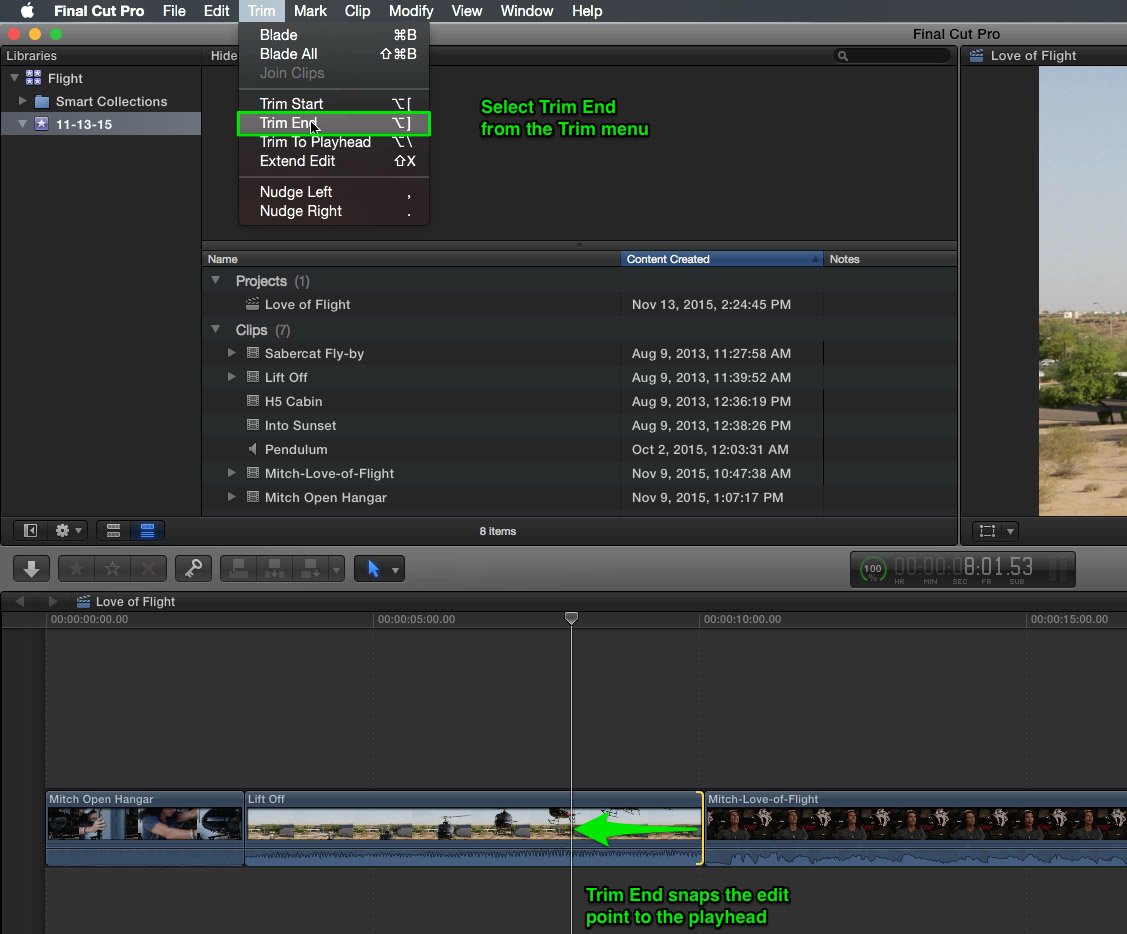
Click and drag the tail of the Lift Off clip until it snaps to the playhead. Lets undo that last step because there is a faster way to perform this edit. With your playhead still parked at 8 seconds, from the trim menu choose Trim End, or Press Option-Right Bracket. The tail of the clip is instantly trimmed to the playhead position. Play the edit back.
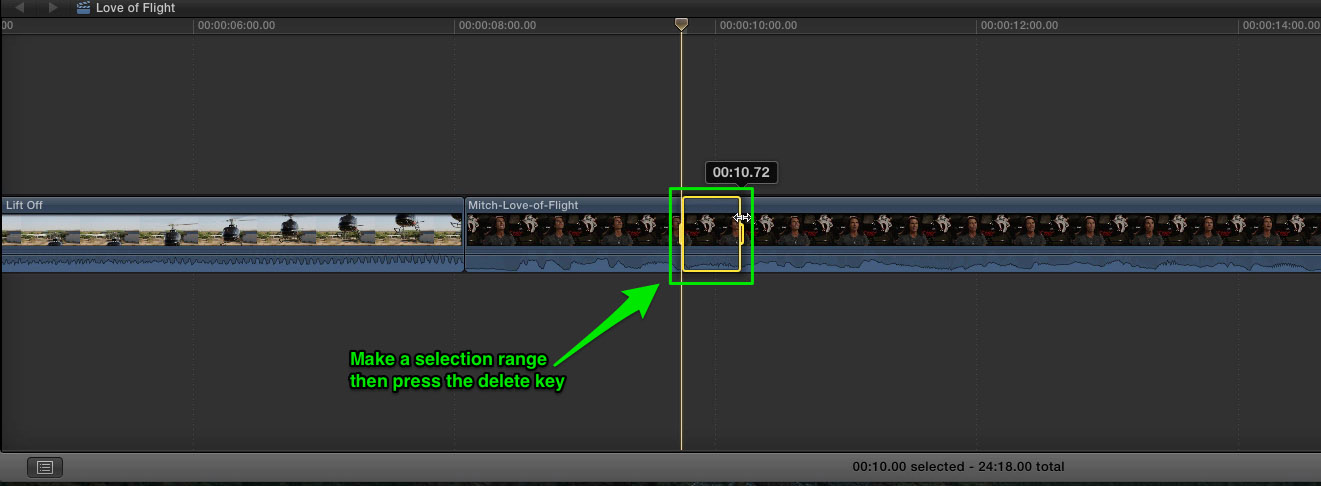
His delivery is much cleaner, but because we also removed video along with the audio, he appears to jump slightly – which is why this edit produces what is called a “jump cut” Let’s hide this jump with another clip. From the tools menu choose the Selection Tool or press A on your keyboard.
Hiding a Jump Cut with B-Roll
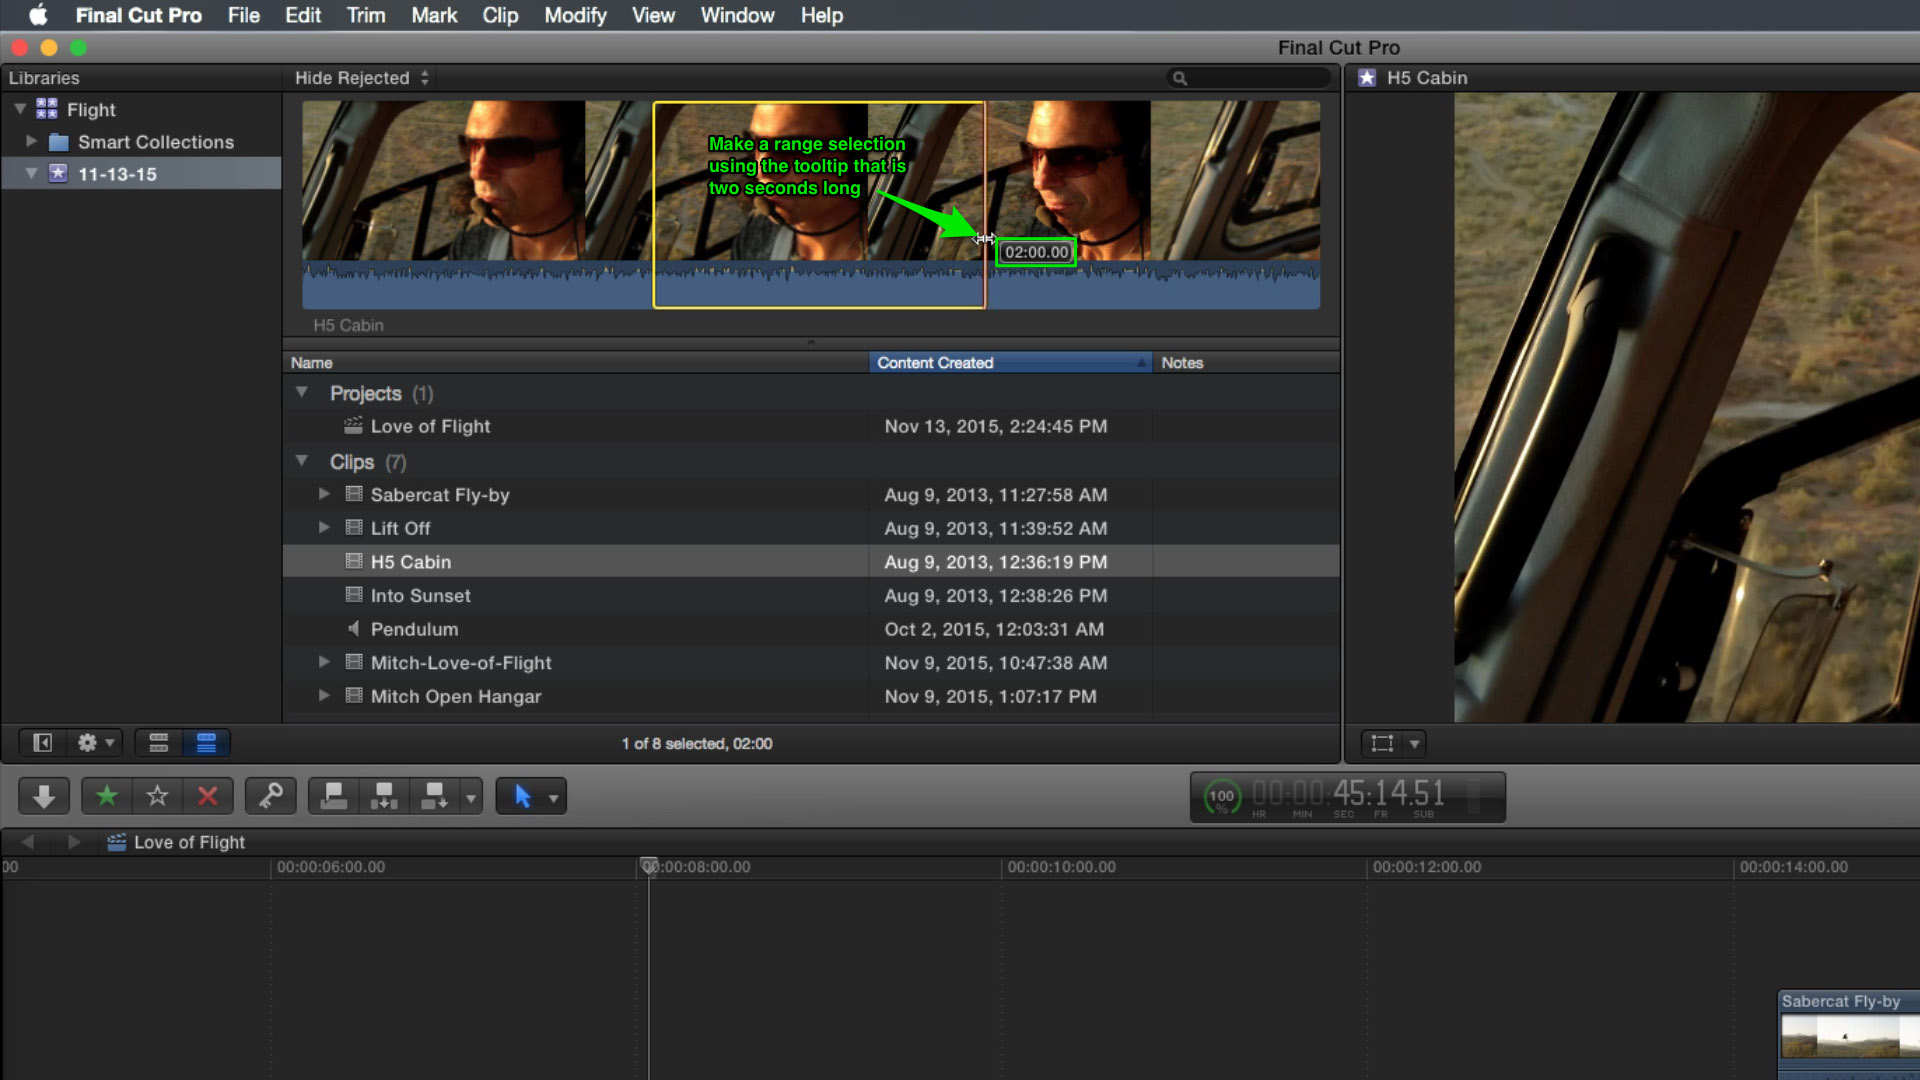
Press the up arrow key to move your playhead to the beginning of the interview clip. In the Media Browser locate the H5 Cabin clip. Drag out a selection, as you drag a tooltip appears showing you the duration of your selection, drag until the tooltip reads 2 seconds.
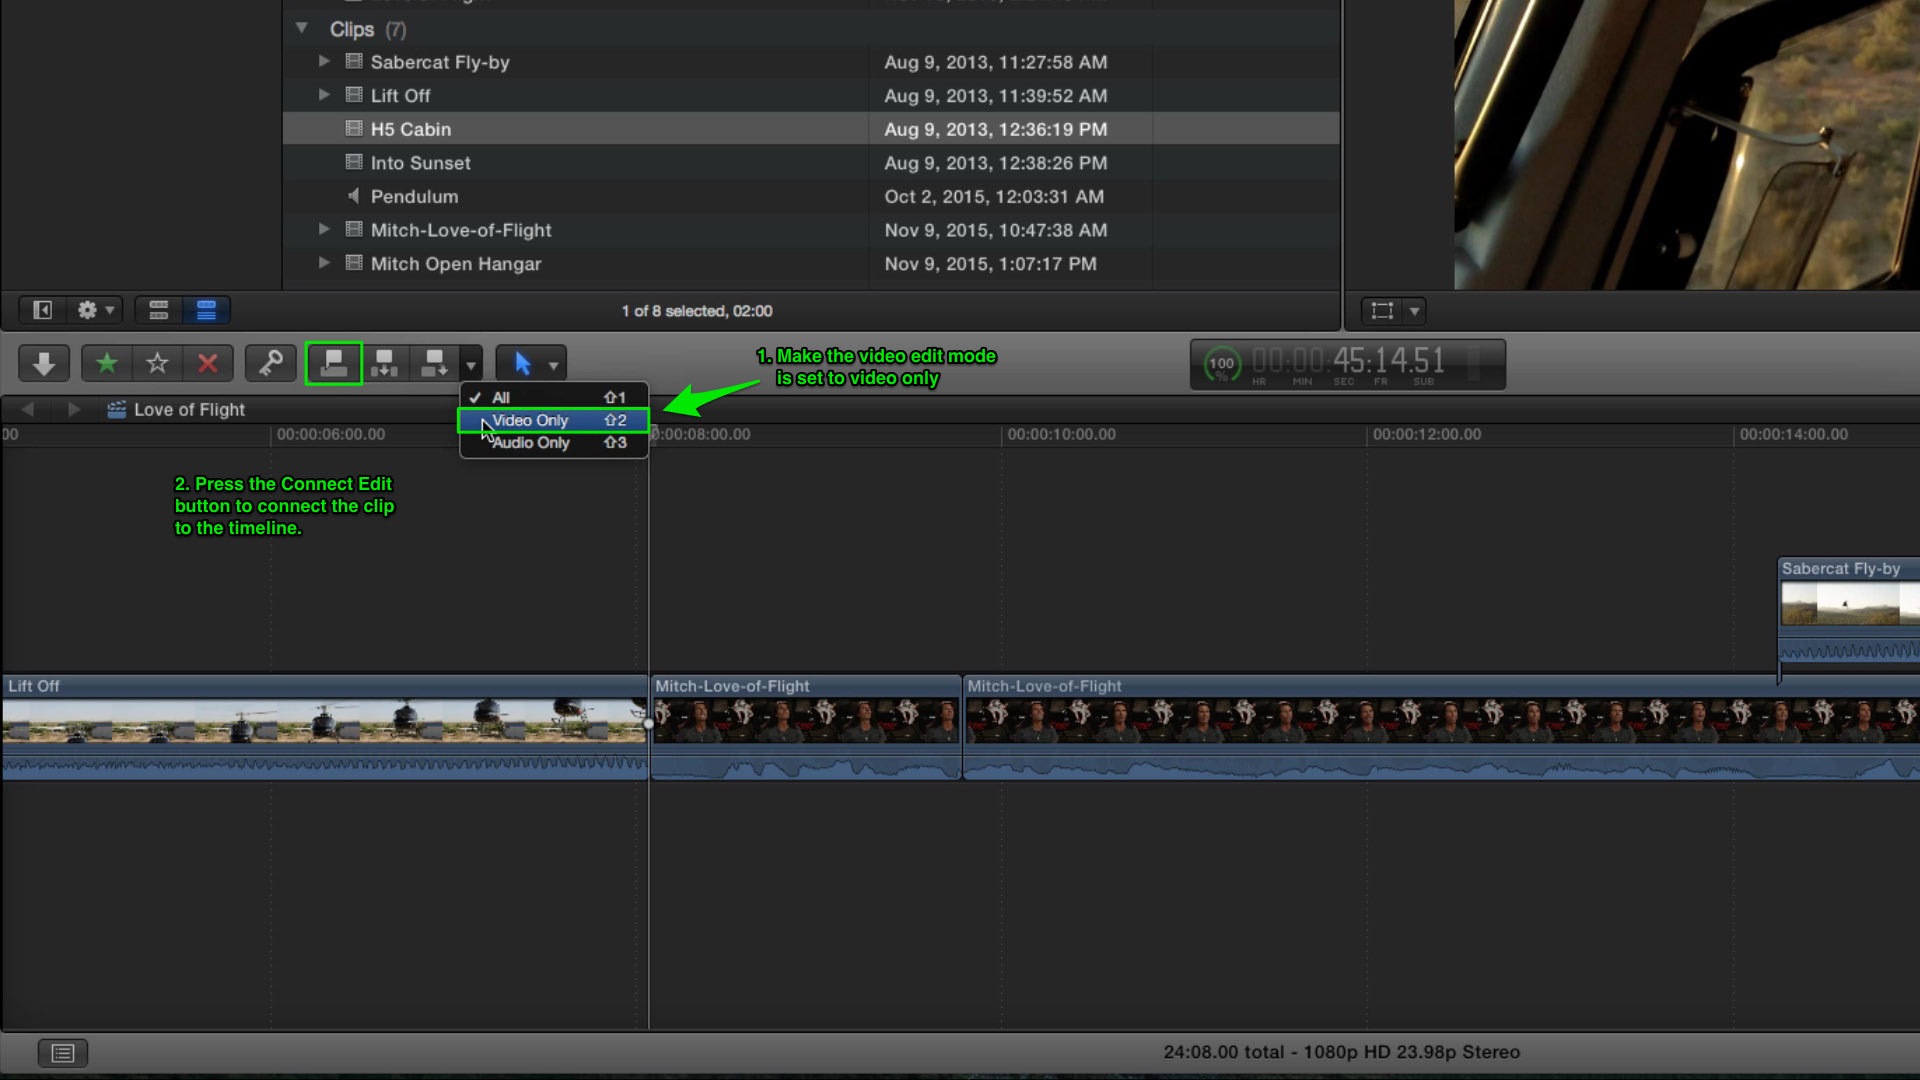
We want to use the video portion of this clip but not the audio. In the toolbar select the edit mode drop down and choose Video Only, then click the Connect Edit button to connect only the video portion to your timeline. Press the home key and playback what you’ve edited so far….. excellent! In the next lesson we’ll begin working with our soundtrack.
This is Lesson 4 of our free Final Cut Pro X tutorial. If you are enjoying this tutorial, show us your appreciation by sharing!
- Lesson 1: Getting Started with the Final Cut Pro X Free Trial
- Lesson 2: Importing Media into Final Cut Pro X
- Lesson 3: Adding Clips in Final Cut Pro X
- Lesson 4: Trimming in Final Cut Pro X
- Lesson 5: Working with Sound in Final Cut Pro X
- Lesson 6: Adding Titles & Transitions in Final Cut Pro X
- Lesson 7: Adding Effects in Final Cut Pro X
- Lesson 8: Sharing your Movie in Final Cut Pro X

