Quickly Organize your Media Using Smart Collections in Final Cut Pro X
Welcome to Final Cut Pro X in Under 5 Minutes. I’m Steve Martin from RippleTraining.com. Today I want to show you where Final Cut Pro really shines in comparison to other editing apps. If I can sum up Final Cut Pro’s awesomeness in one word, it would be metadata.
In this episode, I’m going to show you how smart collections can help you organize your footage in a matter of minutes. I’ve just returned from vacation with a bunch of footage and I want to create a video that people will actually want to watch. But first, I’ll need to organize my library so I can quickly find the clips I want to use.
This event contains all the clips I imported from my GoPro camera. There is no organizational structure, just a data dump of both video and still images. Using a few smart collections, I’m going to turn this chaos into order.
Step 1 Creating Smart Collections: Start by selecting the Event, then press Option-Command-N to create a smart collection. I’ll name this smart collection “Photos”. I’ll press Option-Command-N to create a second smart collection and name it “Video”.
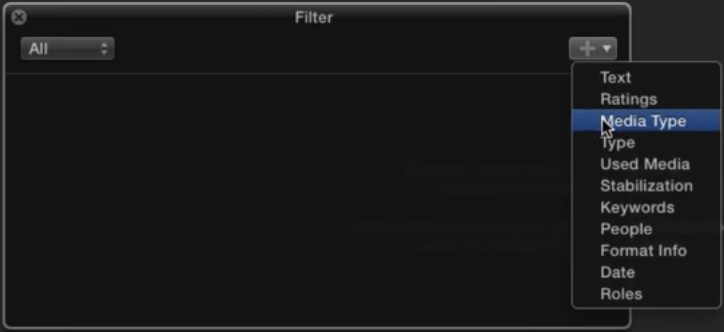
Step 2 Edit Smart Collections: Let’s edit the Photos smart collection by double-clicking. The Filter HUD appears. From the rules popup in the upper right, choose “Media Type”,
then choose “Stills” from the media menu.
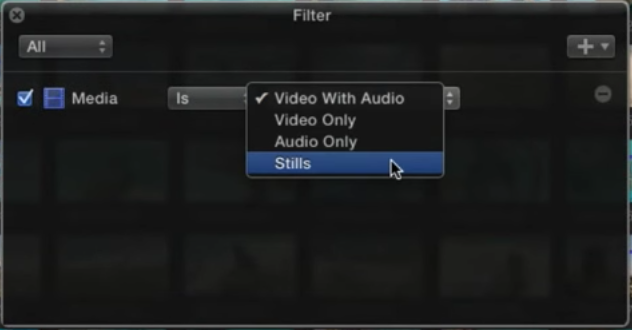
Choosing Stills imposes a strict filter on the collection so that only still images, in this case photos, appear whenever I select this collection in the event. You can think of smart collections as saved searches based on the rules you define in the HUD.
Let’s edit the video smart collection double-clicking, then choosing “Media Type” from the menu. By default, video with audio is the rule, so only video clips with audio appear in the smart collection.
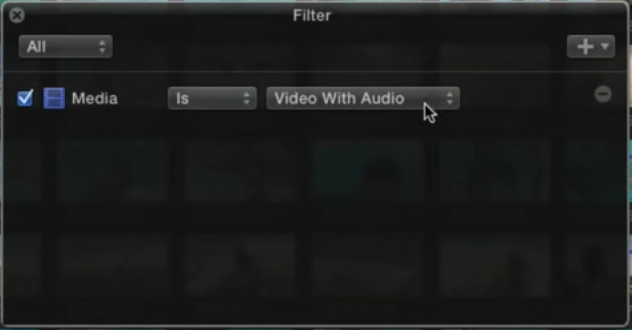
However, you can set the criteria to locate only video clips or only audio clips. I’ll set this back to Video with Audio.
Now I have two separate smart collections, one containing just my photos, and one containing just my video. Using a few more smart collections we can drill down even further to have Final Cut Pro show me only the video clips I want to see. One of the things that I love about Final Cut Pro X is how fast you can skim over an entire library of content looking for material. At this stage I’m not interested in creating selection ranges, only locating and tagging clips that I might want to use in my project.
Step 3 Favoriting Clips: So with my finger poised over the F key, I’ll skim over a clip, and if I like it, I’ll press F to tag it as a favorite. I’ll keep doing this, skimming over each clip, looking for interesting content and pressing F when I want to tag it.
Step 4 Viewing Favorites: To see all your favorites, select Favorites from the Filter menu.

The one thing I don’t like about this filter is that it’s a global search return. That is, if you’ve favorited photos or audio clips, they will also appear in the search. Also, many times I forget to reset this filter back to “All Clips”

and for a few seconds I’m wondering where all my clips went. Am I the only one this happens to?
Anyway, I have a better solution and it involves creating another smart collection. With the video smart collection selected, press Command-D to duplicate it. No sense creating one from scratch if you don’t need to. I’ll remove the word “copy” and add the word “Favorites”.
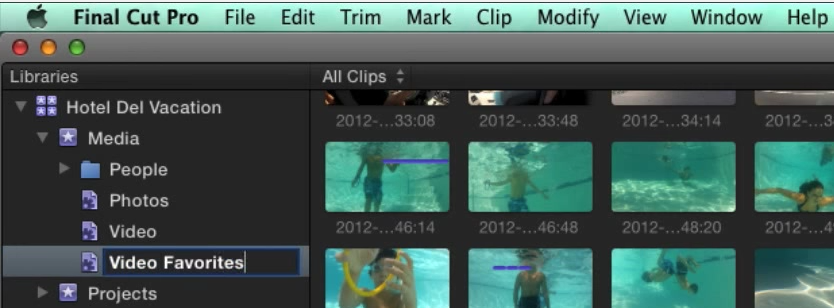
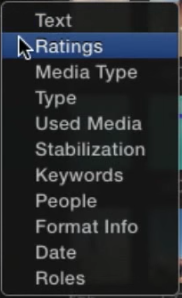
Double-click the smart collection to open the HUD. From the rule pop up, I’ll choose “Ratings”.
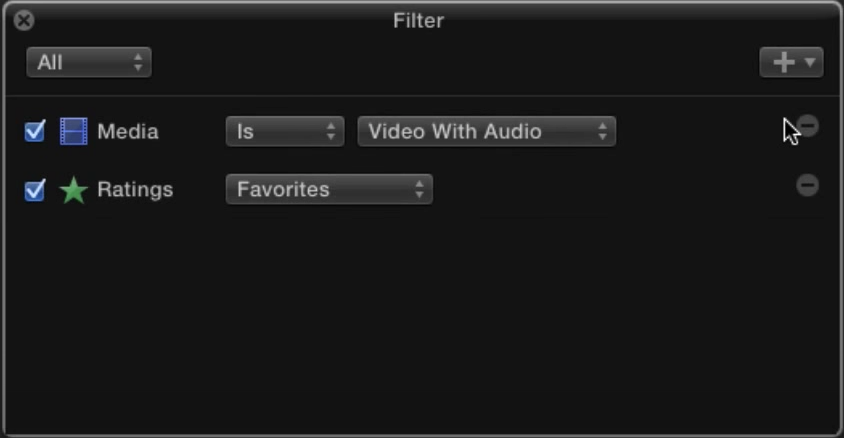
Now this smart collection is defined by both its media type and its ratings rule and only video clips with audio that have been rated will appear in this smart collection. Any other clip types that have been rated will not appear.
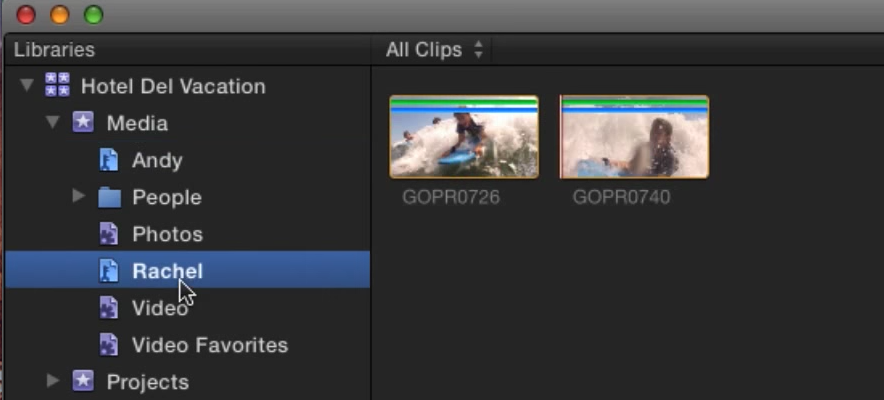
Step 5 Keyword Tagging Clips: As I skim over these favorites, I see shots of my son, Andy, my daughter, Rachel, their friends, etc. I want to create collections that separates these clips by subject. I’ll select these shots of Andy, then press Command-K to bring up the Keyword HUD, enter Andy in the keyword field, then press Return to tag them.

I’ll do the same for Rachel, selecting her clips, then tagging them.
Tip: In the Event there are now separate keyword collections for Andy and Rachel, that when clicked on, will only reveal those clips.
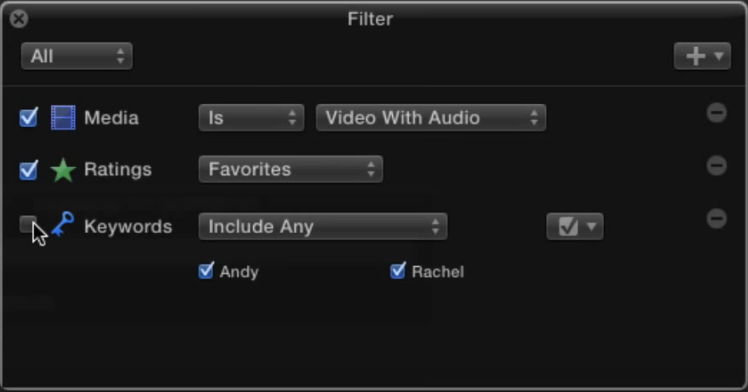
While that’s certainly useful, there are times when I want to see all my favorite subjects in one collection. I’ll double-click on the Video Favorites collection to open the HUD then add a Keyword rule. All the keywords that have been used will appear in the bottom of the rule.
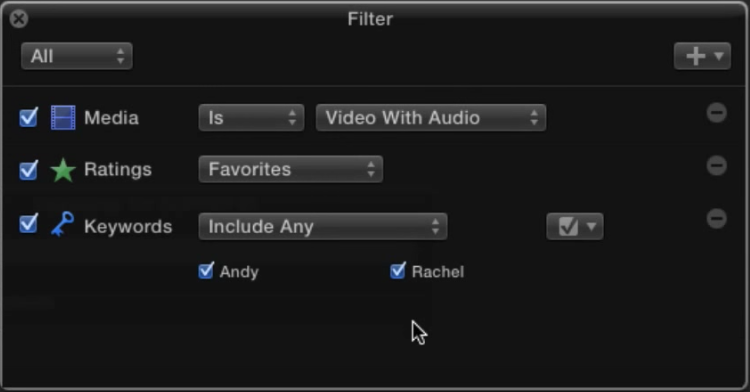
In this case both Andy and Rachel Keywords are checked and now only Andy and Rachel favorited clips will appear in this collection. Here’s what’s really cool- if I want to see just Andy clips, I uncheck Rachel. If I only want to see Rachel clips, I uncheck Andy. And, if I don’t want any filtering based on keywords I simply turn off the filter.
